
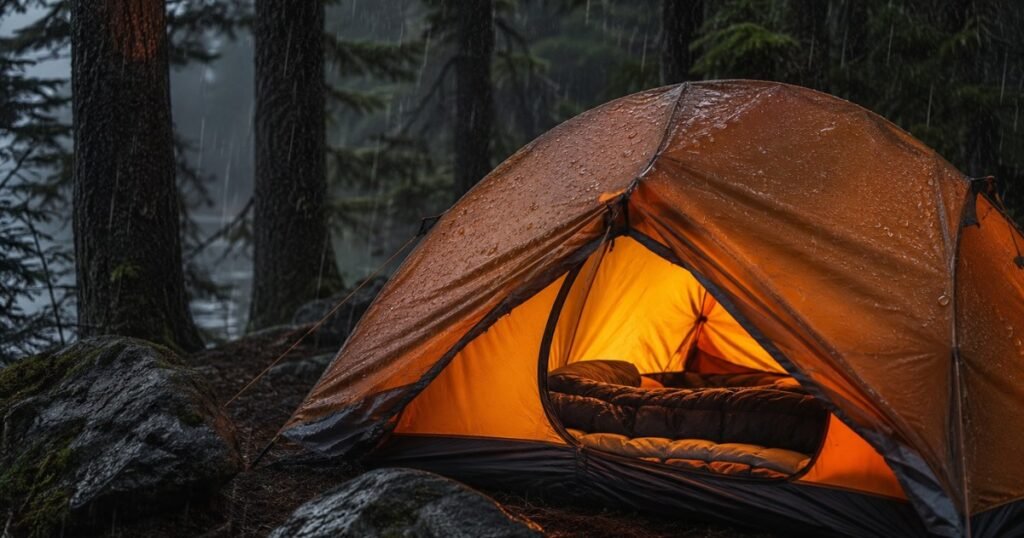
Low-cost, practical advice for first-time campers caught in wet weather — from site selection to gear hacks that actually work.
Key Takeaways
- Rain doesn’t cancel camping — preparation does — and most of the work happens before you ever leave home
- The #1 beginner mistake in wet weather: setting up the tent before the tarp — this gets the tent interior wet during setup and is entirely avoidable
- A tent flysheet rated PU 2000mm or higher handles the vast majority of regular rain — you don’t need to spend on premium waterproofing to stay dry
- Cotton kills comfort in the rain — wet cotton against skin loses all insulating ability and stays wet for hours; synthetic or wool is non-negotiable
- The most budget-friendly rain protection system costs under $10: heavy-duty trash bags inside your pack protect sleeping bags and clothing as effectively as dedicated dry bags
Does Rain Ruin Your Camping Trip?
Short answer: only if you let it.
Longer answer: rain does something to a campsite that dry weather simply can’t. It clears out the crowds. It brings in that particular forest smell — petrichor on pine needles, damp earth, the clean-air quality that only happens when rain washes everything. It slows everything down in the best way. And if you’re inside a properly pitched tent with a cup of something hot while it drums steadily on the fly above you — that’s not a ruined camping trip. That’s one of the genuinely good ones.
The problem isn’t rain. The problem is not knowing how to camp in the rain before you go. Most beginners either cancel the moment they see rain in the forecast (understandable, but a loss) or show up underprepared and have a miserable time that puts them off camping for a season. Neither has to happen.
This guide is for the version of you that’s standing at the trailhead or campsite parking lot, rain starting or forecast, wondering what to do next. Five practical techniques that experienced campers use without thinking — and a checklist that covers everything you need to have already packed. The skills aren’t complicated. The preparation is most of the work.
5 Foolproof Tips for Camping in the Rain (Zero Experience Required)
1. Scout Your Campsite: Avoid the “Bathtub” Zone
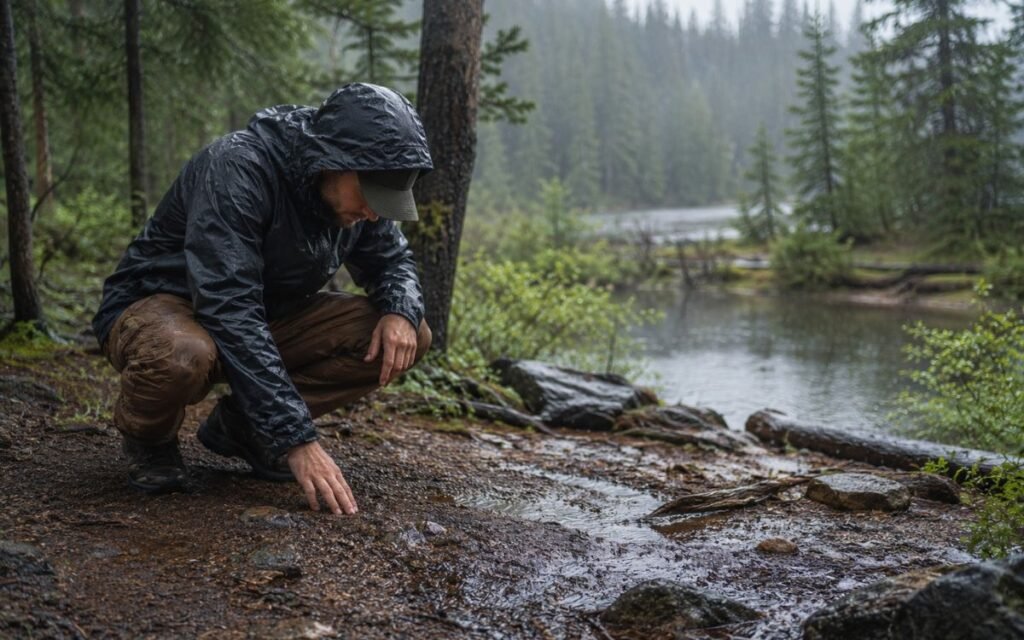
Before a single piece of gear comes out of your car, before the tent bag is even unzipped, walk your campsite. This five-minute investment prevents the most common cause of waking up wet: choosing the wrong spot.
Water follows gravity. When it rains, every surface that can’t immediately absorb water channels runoff toward whatever low point is available. If your tent is that low point — if you’ve pitched in a depression, a natural bowl, or the lowest spot in a clearing — water will find you. This is the bathtub effect: your tent becomes the collection point for everything that drains off the surrounding terrain, and eventually, that water works its way under the floor and in through seams.
What you’re looking for:
A site with a gentle slope — not so steep you’ll roll in your sleeping bag, but enough that water moves away from where you’re sleeping rather than toward it. Even a 2–3% grade is sufficient to redirect runoff.
Ground with some vegetation cover. Grass and plant roots hold soil structure, which means better drainage. Bare compacted dirt — common at heavily used sites — sheds water instead of absorbing it and channels it in unpredictable directions.
No obvious drainage channels within 10–15 feet of your intended tent spot. Dried streambeds, v-shaped depressions, and visible water marks on rocks or soil are all signs of where rain goes when it falls here. Don’t sleep in those paths.
Nearby trees for a windbreak, but not directly overhead. Trees catch and hold water, then release it in concentrated drips long after rain stops — louder and wetter than the rain itself, and often concentrated enough to eventually work through a fly. Camp near trees, not under them.
The one-minute test: Stand at your intended pitch spot and imagine pouring a bucket of water directly there. Which way does it flow? If the answer is “toward where I’m going to sleep” — find a different spot.
2. Pitch Your Tarp BEFORE Your Tent
This is the technique that divides people who camp comfortably in the rain from people who have a miserable time and can’t figure out why. It’s counterintuitive enough that most beginners never discover it until they’ve had one wet setup experience.
The standard beginner approach: Rain starts or you arrive to a wet site. You rush to get the tent up as fast as possible. In the scramble, the tent bag sits on the wet ground while you sort the poles. The inner tent touches the wet fly during setup. Sleeping gear comes out too early to help. By the time the tent is pitched, the interior has already taken on moisture from the setup process itself — before you’ve even slept in it.
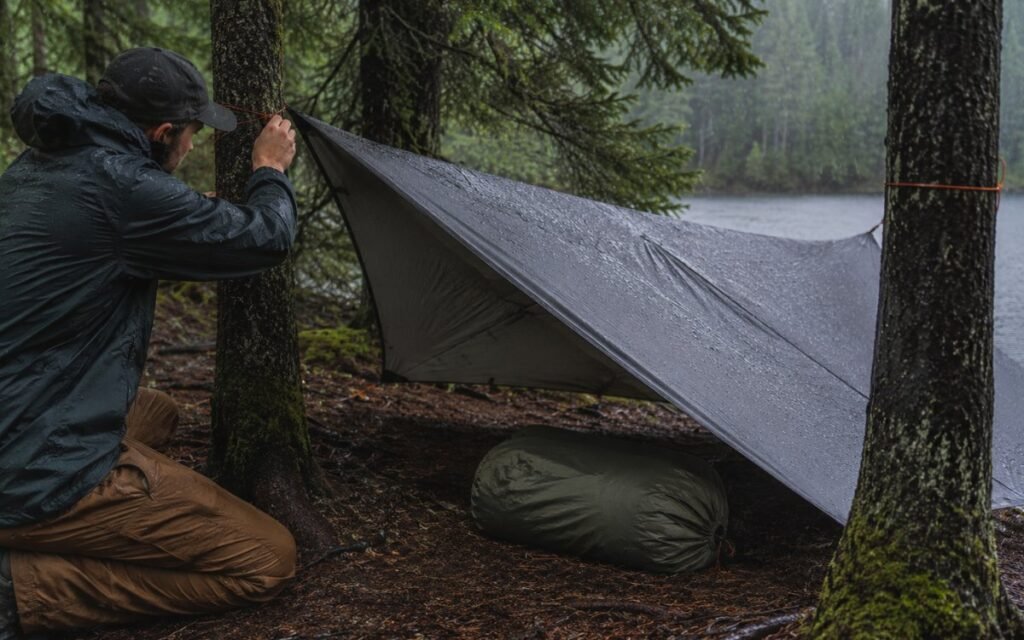
The tarp-first approach: Before anything else leaves your car or bag, establish a covered workspace. String your tarp between two trees with a ridgeline cord, stake the corners out, and create a dry zone large enough for you, your tent, and your gear during the entire setup process. Then, standing in that dry space, assemble and pitch your tent at a normal pace. Nothing gets wet during setup. You’re not racing the rain.
Basic tarp rigging for beginners:
Identify two trees roughly 10–12 feet apart. Tie your ridgeline cord to each at a height of 6–7 feet — a simple clove hitch works; don’t overthink the knot. Drape the tarp over the cord and let it hang. Stake the four corners out at an angle to create tension — the tarp should be taut, not sagging, so water runs off rather than pooling. Done. This takes under 10 minutes with 20 feet of paracord and a poly tarp.
What to buy: For car camping, a basic poly tarp from a hardware store (8×10 or 10×12, $15–25) is completely functional. It’s heavier than outdoor-specific options but costs a fraction of the price. Add 30 feet of paracord ($8–10) and six extra tent stakes ($10–12 for a pack), and your complete rain shelter setup costs under $50.
The practice rule: Rig your tarp once in your backyard before you need it in the field. The technique is simple, but the first attempt always takes longer than expected. A dry-run at home means you’ll have it up in 10 minutes when it’s actually raining.
3. Master the “Inside-Out” Footprint Fold
This is a specific technique that solves a specific problem — one that’s caused more wet sleeping bags than most beginners ever suspect.
Most campers know that a tent footprint (ground cloth) goes under the tent to protect the floor from abrasion and moisture. What most beginners don’t know is the single most important rule about how to use it in rain:
The footprint edge must not extend beyond the tent’s outer perimeter.
Here’s why it matters: if any part of the footprint sticks out from under the tent, it becomes a collection surface for rainwater flowing across the ground. The footprint catches that water and holds it right at the edge of your tent floor — which is, unfortunately, where water needs to be in order to work its way in from below. You’ve accidentally built a moat around your sleeping area, with the walls on the inside.
The correct footprint setup, step by step:
- Lay the footprint flat in your intended tent position
- Before pitching the tent, fold back any edges that would extend beyond the tent’s planned footprint — fold them inward and under, toward the center
- Pitch the tent on top of the folded footprint
- After pitching, walk the entire perimeter and check: you should see no footprint anywhere outside the tent walls
- If any edge has crept out, tuck it back under the tent before the rain starts
For tarps used as footprints: Tarps are almost always larger than the tent — which means this issue is more severe and more commonly a problem. When using a tarp as a footprint, fold it aggressively: better to have the tarp edge 4–6 inches inside the tent perimeter than to risk even a few inches sticking out. In heavy rain, even a small exposed edge channels enough water to create problems.
The quick check: Once fully set up, look at the ground around your tent. You should see the tent, its stake lines, and nothing else. If you can see groundsheet fabric peeking out from under a wall, that’s where your sleeping bag will eventually get wet from below.
4. The Budget “Trash Bag” Packing Method
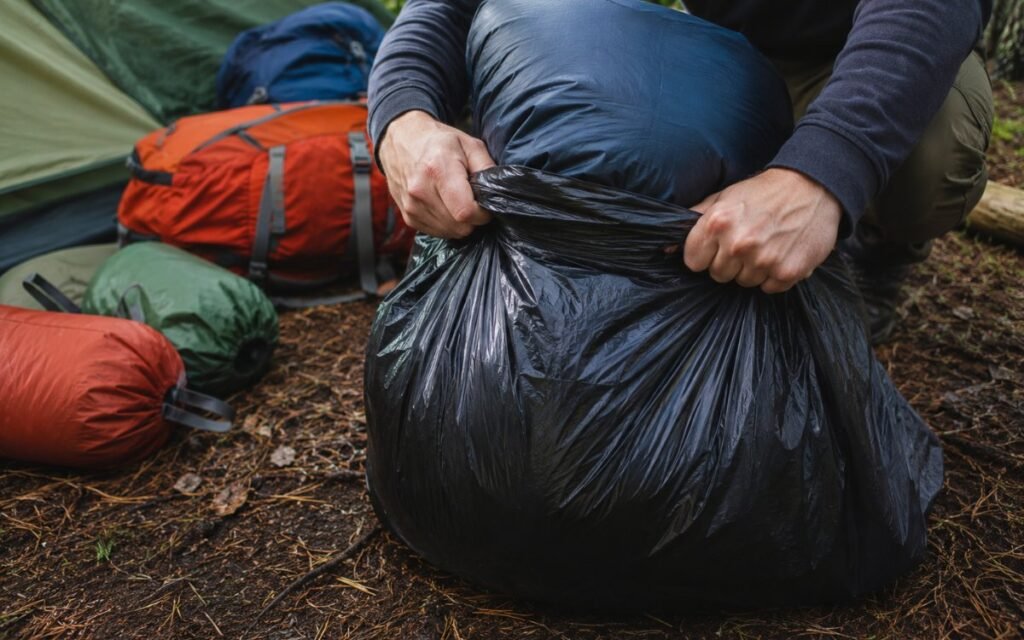
This is the most democratic rain camping technique available — it costs almost nothing, works better than most people expect, and levels the playing field between well-equipped experienced campers and first-timers using borrowed gear.
The principle: Even “water-resistant” bags, stuff sacks, and outdoor packs will eventually wet through in sustained rain. Your tent flysheet provides meaningful protection inside the tent, but getting gear from the car to the tent — or between camp areas in the rain — exposes everything to the elements during transfer. The trash bag method provides a guaranteed waterproof layer inside every container, at essentially zero cost.
How to do it:
Before packing anything into your bag, bin, or pack:
- Open a heavy-duty trash bag (55-gallon contractor bags work best — thicker than kitchen bags, won’t tear on gear corners)
- Place your sleeping bag inside the trash bag first
- Twist the opening closed and tuck it under the sleeping bag
- Place the trash-bag-wrapped sleeping bag inside its normal stuff sack
Repeat for: any additional insulating layers, your complete change of dry clothing, socks (especially socks — dry socks are enormously important to wet-weather morale), and any electronics.
What the trash bag protects against: Rain during transport between car and campsite. Condensation inside your pack during sustained rain. Water that works its way into a pack through stress points, seams, or zippers over time. The sleeping bag getting set down on wet ground during tent setup.
Why this matters for sleeping bags specifically: A wet sleeping bag is not just uncomfortable — in cold conditions, it’s a genuine safety concern. Down insulation loses virtually all insulating ability when wet. Synthetic insulation retains more warmth wet, but still significantly less than dry. Either way, a wet sleeping bag in cold temperatures creates real risk of dangerous body temperature loss. The trash bag prevents this scenario entirely for under $5.
Editor’s note: A pack of 10 heavy-duty contractor bags costs $8–12 at any hardware store. This is the best $8 you’ll spend on rainy camping gear. Dedicated dry bags are excellent and worth buying eventually — but the trash bag method works just as well in most car camping scenarios and costs a fraction of the price.
5. Keep Cotton Out of Your Wardrobe
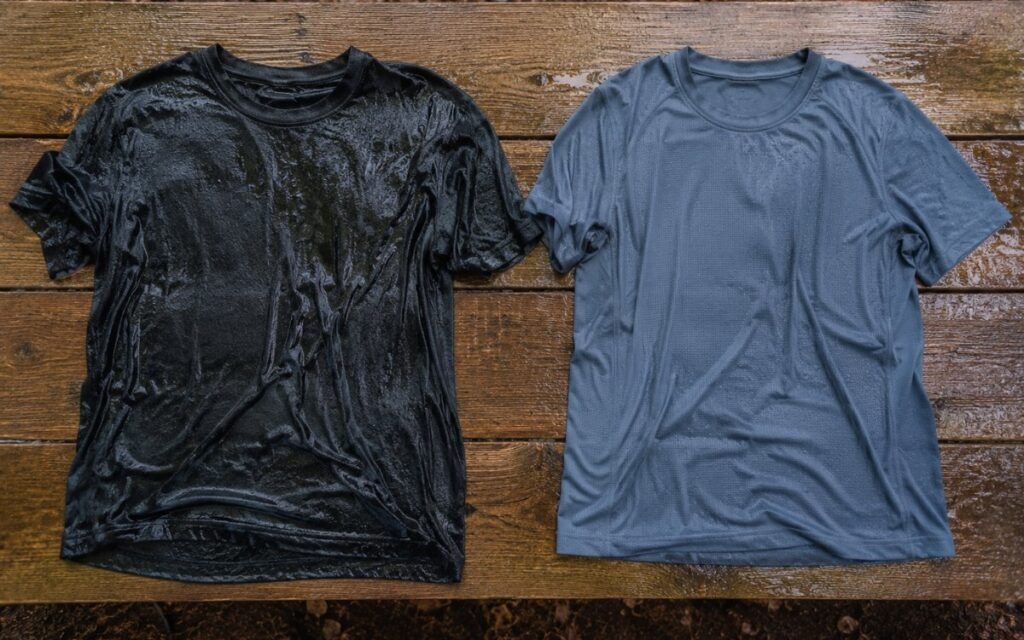
This one isn’t a setup technique — it’s a packing decision you make at home, before you leave. And it’s the choice that separates people who stay warm in wet weather from people who spend the evening shivering and confused about why.
Why cotton fails in rain: Cotton fiber absorbs water readily and holds it. A wet cotton shirt, base layer, or pair of socks doesn’t just feel cold and clammy — it actively works against your body’s ability to stay warm. Cotton traps moisture against your skin rather than moving it away, and stays wet for hours even in conditions that would dry synthetic fabric relatively quickly.
In mild temperatures, this means sustained discomfort. In genuinely cold, wet conditions, wet cotton against skin accelerates heat loss significantly enough that “cotton kills” has become a consistent maxim in outdoor safety education. It’s not hyperbole — cold and wet combined with poor insulation is the condition most likely to produce hypothermia in mild-weather outdoor settings.
What to replace it with:
Merino wool: The premium option. Naturally moisture-wicking, naturally odor-resistant, stays warm even when damp, and comfortable against skin for multiple days. More expensive than synthetic options, but genuinely worth it as a base layer investment for anyone who camps regularly.
Synthetic moisture-wicking fabrics (polyester, nylon): Effective at moving moisture away from skin, dry faster than merino, significantly more affordable. The trade-off is odor retention over multiple days — less relevant on a weekend trip.
The complete wet-weather clothing system:
- Base layer (merino or synthetic): manages moisture against your skin
- Mid layer (fleece or synthetic insulation, not down): provides warmth; note that down insulation, like cotton, loses most of its warmth when wet — fleece or synthetic puffy retains more warmth in damp conditions
- Outer layer (waterproof rain jacket + rain pants): keeps rain off you entirely
All three layers serve different functions. The outer layer keeps rain out. The mid layer keeps you warm if some gets in. The base layer keeps moisture off your skin regardless. In sustained rain, you want all three working together.
The specific items to leave at home: Cotton t-shirts, cotton underwear (a genuine problem most people don’t think about), cotton socks (wet cotton socks cause blisters at an accelerated rate), and denim in any form — denim absorbs significant water, takes days to dry, and becomes genuinely heavy and cold when saturated.
The Ultimate Rainy Day Camping Checklist
Shelter & Sleep
| Item | Key Detail | Budget Range |
|---|---|---|
| Tent with full rainfly | Flysheet must cover vestibule area | Varies |
| Flysheet/tent rated PU 2000mm+ | Minimum for regular rain (see next section) | Included in most tents |
| Tent footprint (sized correctly) | Must not extend beyond tent perimeter | $15–30 |
| Tarp 8×10 or larger | Your covered workspace and kitchen shelter | $15–25 (hardware store) |
| Ridgeline cord (30 feet) | For tarp rigging between trees | $8–12 |
| Extra tent stakes (8–10 additional) | Tarp + wind requires more than dry-weather camping | $10–15 |
| Sleeping bag in trash bag | Guaranteed dry regardless of what happens | Trash bag: $1 |
| Sleeping pad (R-value 2.0+ for 3-season) | Ground insulation critical in cold, wet conditions | $30–80 |
Clothing
| Item | Key Detail | Budget Range |
|---|---|---|
| Waterproof rain jacket | No cotton, waterproof rating vs water-resistant | $40–80 |
| Rain pants | Legs get wet faster than most people expect | $25–50 |
| Merino or synthetic base layer (top + bottom) | No cotton against skin | $30–60 per piece |
| Fleece mid-layer (not down jacket) | Retains warmth when damp, unlike down | $30–50 |
| Wool or synthetic hiking socks ×3+ pairs | Bring twice as many as you think you need | $15–25 per pair |
| Camp sandals or Crocs | Campsite walking in wet conditions without soaking boots | $20–40 |
| Warm hat (wool or synthetic) | Head insulation matters in cold rain | $15–25 |
| Waterproof gloves | For cold rain; optional in mild conditions | $20–35 |
Camp Tools & Rain Essentials
| Item | Key Detail | Budget Range |
|---|---|---|
| Heavy-duty trash bags (55-gallon) ×5+ | Your budget dry bag system; pack multiple | $8–12 for pack |
| Waterproof headlamp (IPX4+) | Standard headlamps fail in sustained rain | $25–40 |
| Microfiber towels ×2 | Dries fast; use for wiping tent exterior, gear, yourself | $15–25 |
| Ziplock bags (multiple sizes) | Electronics, documents, fire-starting materials | $5–8 |
| Matches in a waterproof case + lighter | Two fire-starting methods; keep both dry | $8–15 |
| Duct tape | Emergency tent repair, tarp patching, endless uses | $5–8 |
| Waterproof phone case or dry bag for phone | Sustained rain exceeds most phones’ water resistance | $10–20 |
| Small camp broom or brush | Keeps wet debris out of tent interior | $8–12 |
Kitchen in the Rain
| Item | Key Detail | Notes |
|---|---|---|
| Camp stove with windscreen | Rain and wind affect flame; windscreen is essential | Most two-burner stoves include one |
| Extra fuel canister | Rain camping uses more fuel — hot drinks, extra cooking | Budget at least one extra |
| Covered food storage bin | Keeps packaging intact and food dry | Plastic bin with lid |
| Hot drink supplies | Coffee, tea, hot chocolate — this is the morale category | Non-negotiable |
| Quick-prep meals | Simple one-pot meals minimize time cooking in rain | Pre-plan before arriving |
Essential Gear Upgrades: What Waterproof Rating Do You Actually Need?
Waterproofing specs on camping gear can feel like a wall of numbers designed to confuse you into spending more. Here’s what the numbers actually mean — and what you actually need.
The key measurement: hydrostatic head (HH) Waterproofing on tents and jackets is measured in millimeters — specifically, how tall a column of water the fabric can hold before it leaks through. The higher the number, the more waterproof the material.
What the numbers mean in practice:
| Rating | What It Handles |
|---|---|
| PU 800–1200mm | Light rain, brief showers only |
| PU 1500–2000mm | Standard camping rain — this is the minimum to look for |
| PU 3000–5000mm | Heavy sustained rain, driving rain with wind |
| PU 10,000mm+ | Extreme conditions, mountaineering |
The practical guidance for beginners: For your tent flysheet and floor, PU 2000mm is the threshold that handles the vast majority of regular camping rain — including sustained overnight rain, not just light showers. Most tents in the $80–200 range meet or exceed this. You don’t need to spend on 5000mm+ ratings for standard car camping in regular weather.
For rain jackets, 10,000mm+ is genuinely useful for sustained activity in heavy rain, but 2500–5000mm handles most camping scenarios adequately. The seam construction (fully seam-sealed vs partially vs not at all) often matters as much as the rating number — water enters through seams before it enters through the fabric itself.
One thing to check before any rain trip: Re-applying DWR (durable water repellent) treatment to a tent fly or rain jacket that has lost its beading effect. Water that soaks into the fabric rather than beading up significantly reduces effective waterproofing even if the fabric’s rating is technically intact. A $10 can of spray-on DWR restores this and makes a meaningful difference.
What to Do in the Tent When It Won’t Stop Raining
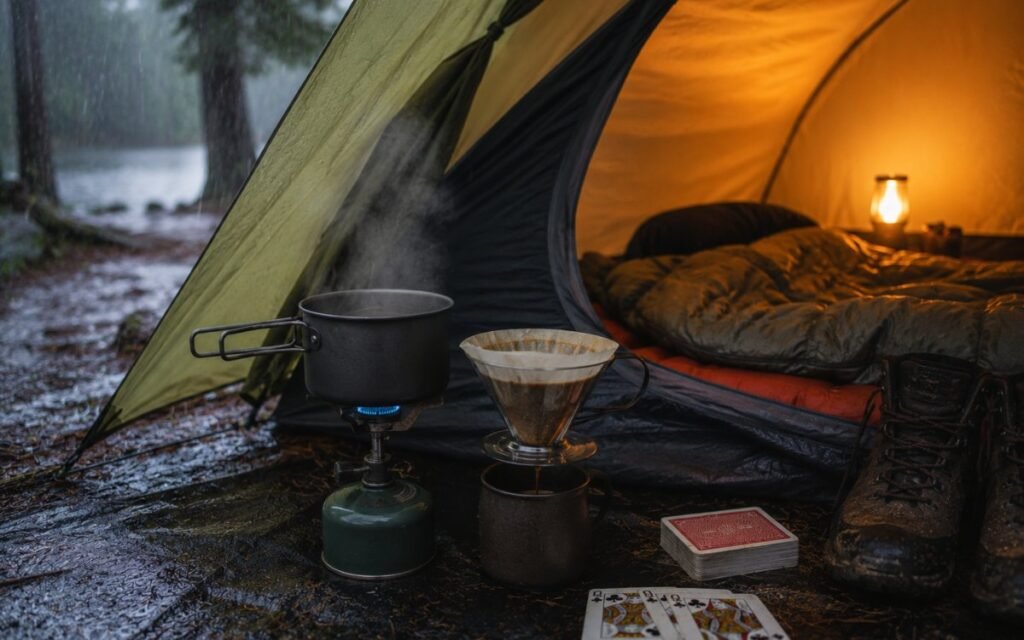
The rain isn’t stopping. You’ve checked. You’ve checked again. It’s going to be one of those afternoons.
This is actually fine — once you accept it rather than fight it, a rain-bound tent afternoon has a particular quality to it that’s hard to find elsewhere. You’re genuinely off-grid. There’s nowhere you’re supposed to be. The to-do list doesn’t apply here.
The camp stove becomes your best friend in this scenario: Light the stove (just outside the tent vestibule, with the rain fly providing cover — never inside), and make something hot. Instant ramen at a campsite, cooked in five minutes on a canister stove and eaten from the pot, tastes significantly better than it has any right to. A French press camp coffee while rain falls outside is one of the experiences that converts one-time campers into regulars.
Pack something specifically for this kind of time: A card game (UNO takes up almost no space and works for 2–6 people). A novel you’ve been meaning to read. A journal. A small sketchbook. These don’t need to be camping-specific purchases — they’re just things that don’t require a screen or a signal.
The podcast/audiobook option: Download before you leave. Rain in the woods is actually excellent background sound for a long podcast or an audiobook. An afternoon in a tent listening to something good while rain falls outside is a version of rest that most people rarely get.
The practical tent comfort setup for a long stay: Sleeping pad fully inflated as a seat, sleeping bag used as a blanket, small stuff sacks as backrests or armrests. It’s not a couch, but with a few small adjustments it becomes remarkably comfortable for an extended stay.
FAQ: Camping in the Rain
Q: Is it safe to camp in the rain?
Yes — camping in the rain is safe when you’re properly prepared. The key risks in wet weather are hypothermia from wet clothing and cold temperatures, and flooding from poor site selection. Both are preventable: wear moisture-wicking layers (no cotton), choose a campsite with good drainage, and never pitch in a low-lying area. At a developed campground with facilities nearby, rain camping is genuinely low-risk for most weather conditions.
Q: What should I do if my tent leaks in the rain?
First, check whether your rainfly is properly tensioned — a sagging fly that touches the inner tent creates a moisture bridge that lets water through even on an otherwise waterproof tent. Re-tension and re-stake the fly so there’s a visible gap between fly and inner tent. If the leak is coming from a seam, apply seam sealer (available at outdoor stores) when conditions are dry. For an immediate fix in the field, duct tape over the problem area buys you through the night.
Q: Can I use a camp stove inside the tent when it’s raining?
Never use a camp stove inside the tent body. Carbon monoxide accumulates in enclosed spaces and is both odorless and dangerous. The correct approach: use the tent vestibule (the covered porch area outside the tent door) with the fly providing overhead protection. Keep the stove at the vestibule entrance with at least partial ventilation. If your tent doesn’t have a vestibule, cook under your tarp with the stove positioned outside the tent entirely.
Q: How do I keep my sleeping bag dry when camping in the rain?
The most reliable method: place your sleeping bag inside a heavy-duty trash bag before putting it in its stuff sack. Twist the bag closed and tuck the end under. This creates a fully waterproof layer around your sleeping bag regardless of what happens to your outer bag or tent. Never leave your sleeping bag out of its protective layer during tent setup — this is when it’s most vulnerable to accidental moisture.
Q: What’s the best tent for camping in the rain?
For most beginner rain camping scenarios, look for a tent with a flysheet rated PU 2000mm or higher, fully seam-sealed construction, and a vestibule for gear and stove use. You don’t need to spend on premium ratings (5000mm+) for standard camping rain. A 3-season tent in the $100–200 range with these specs handles the vast majority of regular rain conditions. More important than the tent rating: pitching it correctly with a properly sized footprint and well-tensioned fly.
Q: What do I do if it rains and I haven’t set up camp yet?
Prioritize in this order: (1) Set up your tarp first to create a covered workspace. (2) Under the tarp, pitch your tent. (3) Move sleeping gear inside the tent immediately — don’t leave it in the rain during setup. (4) Organize your kitchen area under the tarp. If you don’t have a tarp, use your car as a staging area: assemble tent components in the car, carry them to the site already connected, and pitch as quickly as possible.
Q: How do I dry wet camping gear after a rainy trip?
Unpack everything as soon as you get home — don’t leave damp gear stored. Hang the tent body and fly separately to air dry completely before storing. For sleeping bags: air dry in a warm, ventilated space (not a dryer on high heat for down bags — use low heat or air dry). Wet clothing goes directly to the wash. Pay particular attention to sleeping pads and tent footprints — moisture trapped in folds can cause mildew. Store everything only when completely dry.
Conclusion: Rainy Camping Is Worth Doing

Every tip in this guide comes down to the same principle: preparation before the rain is what makes rain camping comfortable. The site selection happens when you arrive. The tarp goes up first. The footprint gets folded correctly. The cotton stays home. The trash bags protect what matters most.
None of it is complicated. All of it is learnable before your first wet-weather trip, without any prior camping experience. And on the other side of the preparation — inside a dry tent, with something hot, while rain makes the woods quieter and the air cleaner — is an experience that surprises most first-timers with how good it actually is.
Don’t cancel the trip. Adjust the preparation. Go.
Want to go deeper on rain camping gear? Read our complete guide on how to choose a budget camping tarp, the best waterproof tent options for beginners, and everything else you need for wet-weather camping without overspending. (Link to Article 2: Rain Camping Gear Guide — coming soon)
Continue building your camping knowledge:
- The Complete Camping Checklist
- How to Set Up a Tent for the First Time
- Camping for Beginners: The Complete Guide
- The Complete Camping Packing List
- Outdoor Safety for Beginners
🌲 Field Notes: The Outdoor Knowledge Behind This Guide (References)
Good rainy camping isn’t about owning the most expensive gear — it’s about understanding how weather, shelter, and your body work together.
The advice in this guide is built from practical outdoor principles used by experienced campers: choosing higher ground, managing moisture, protecting insulation, and preparing before conditions change.
For deeper outdoor safety and camping knowledge, these resources are helpful starting points:
🌧️ Weather Preparation & Campsite Safety
Guidance from the National Park Service (NPS) on planning ahead, understanding changing weather conditions, and making safer choices outdoors.
⛺ Cold, Wet Conditions & Staying Warm
Research and recommendations from the Wilderness Medical Society on preventing heat loss and staying safe when temperatures drop in wet environments.
🧥 Outdoor Layering & Rain Clothing Systems
Educational resources from the American Hiking Society explaining why fabric choice, layering, and moisture control matter in the outdoors.
🌱 Responsible Campsite Selection
Principles from the Leave No Trace Center for Outdoor Ethics on choosing durable campsites and reducing environmental impact.
Because the best camping memories rarely come from perfect weather.
They come from being prepared enough to enjoy whatever the weather brings.