
From picking your campsite to securing the rainfly — everything a first-time camper needs to know, in plain language, with zero assumed experience.
Key Takeaways
- Most beginners can set up a dome tent in 15–20 minutes on their first try; by the third time, it takes under 10
- Practice at home first — this is the single most impactful thing you can do before your first camping trip, and almost nobody does it
- The rainfly must not touch the tent body — contact creates a moisture bridge that defeats waterproofing even in a quality tent
- Stakes should go in at a 45° angle pointing away from the tent, not straight down — this is the most common staking mistake
- Always choose your campsite before unpacking anything — the wrong spot is much harder to fix once the tent is up
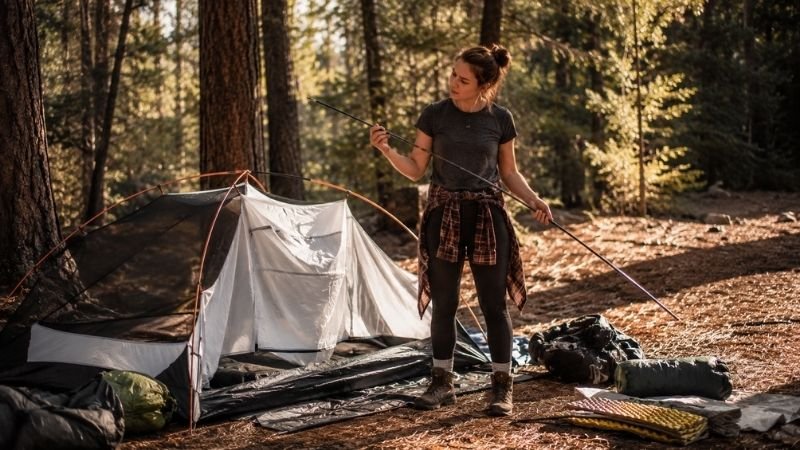
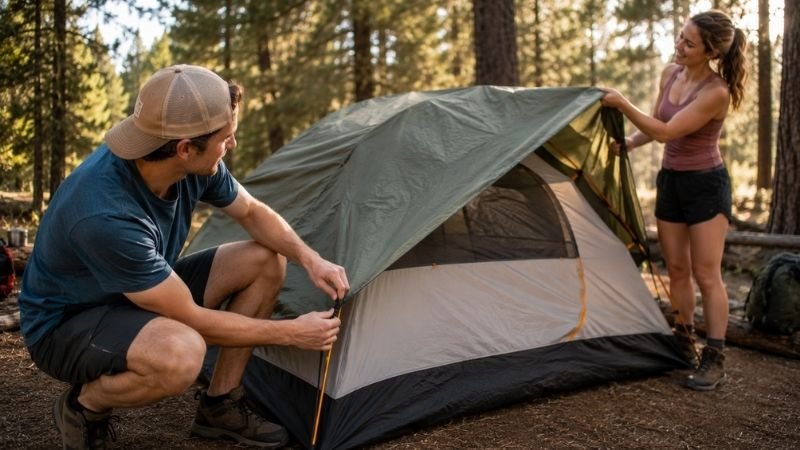
Picture this: it’s getting dark. You’re at the campsite. Everyone else seems to have their tent up already, and you’re standing there holding what looks like a bag full of random poles, a pile of fabric, and a bunch of small metal spikes that may or may not be important. You open the instructions. They’re printed in a font designed for people who already know what they’re doing.
Sound familiar? This is one of the most universal first-camping-trip experiences — that particular combination of excitement and complete confusion that hits the moment you unzip the tent bag. The good news is that setting up a tent is genuinely not difficult once someone explains it in plain terms. The bad news is that most guides are written by people who’ve forgotten what it’s like to have never done it before.
This guide isn’t that. We’re going to go through every step, explain why each one matters, and tell you the things that experienced campers forget to mention — including the one thing you should do before you ever arrive at a campsite.
Step 0: Practice at Home Before You Go
This deserves to be its own step before the actual steps, because it changes everything.
Set up your tent at home. In your living room, in your backyard, on your apartment balcony — anywhere. Do it once, slowly, reading along with this guide or your tent’s instructions. Figure out which poles go where, how the clips or sleeves attach to the poles, how the rainfly connects, and how long the whole thing takes.
This accomplishes several things that matter on your actual camping trip:
You discover missing pieces before you’re in the field. Lost stakes, a cracked pole, a bag that doesn’t close — these are problems you want to find at home, not at the campsite at 7pm.
You check that you have all the components. Tent body, poles, stakes, rainfly, guylines, footprint if included. Count them before you leave.
You eliminate the learning curve from the equation. The second time you set up any tent, it takes half as long. By doing it once at home, you arrive at the campsite already knowing what to do.
This is the single most commonly skipped piece of advice in camping preparation — and probably the single most impactful one. Ten minutes at home saves an hour of frustration at the campsite.
Step 1: Choose Your Campsite Location
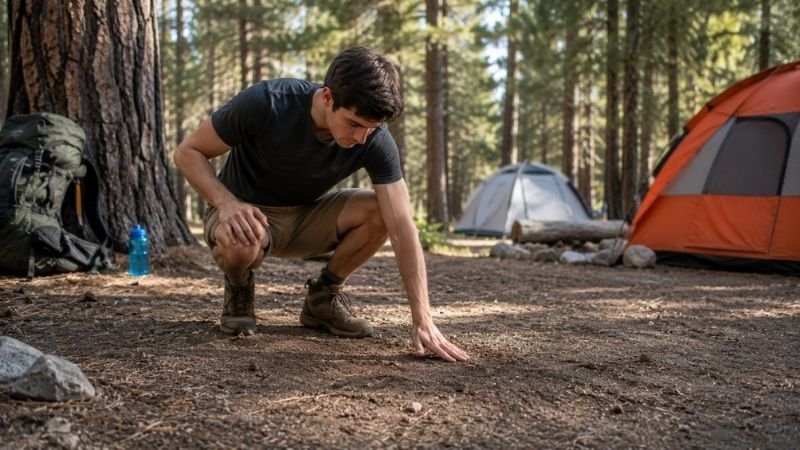
Before you unpack a single thing, walk around and pick your spot. This matters more than most first-timers realize, and it’s much harder to fix once the tent is up.
What to look for:
- Level ground. Even a slight slope makes sleeping uncomfortable — you’ll slowly slide to one side all night. Test it by lying down where you plan to sleep before setting up.
- No rocks, roots, or sharp objects. Get down and clear the area. Pine cones, small rocks, and twigs don’t seem like a problem until they’re under your sleeping pad all night.
- No low-lying areas. Rain collects in dips. If it rains overnight, you want water to drain away from your tent, not toward it.
- No dead branches overhead. Look up. Dead branches (called “widow-makers”) can fall in wind. Give yourself clearance from any that look unstable.
- 200 feet from water sources. This is standard Leave No Trace practice — it protects water quality and keeps you away from the wildlife corridors near water.
- Wind direction. Note which direction the wind is coming from and orient your tent door away from it. Less wind inside when you open the door, less noise at night.
At established campgrounds: Use the designated tent pad if one exists. These spots are already level, established, and help minimize environmental impact.
Step 2: Lay Out the Footprint or Ground Tarp
A footprint is a ground cloth that goes under your tent. It protects the tent floor from abrasion and moisture.
Lay it flat where you’ve chosen to set up. Critical detail: The footprint should be slightly smaller than your tent floor, or tucked under the edges — if it extends beyond the tent, rainwater that drips from the fly will collect on the footprint and pool underneath your tent. This is a very common beginner mistake.
If you don’t have a footprint, a basic tarp works. Same rule applies — tuck the edges under so water drains away rather than collecting.
Step 3: Lay Out the Tent Body and Orient It
Take the tent body out of the bag and lay it flat on your footprint. Before anything else, figure out the right orientation:
- Door faces away from the wind (which you noted in Step 1)
- Door faces a view you want (optional, but nice)
- Vestibule (the covered porch area outside the door) faces wherever you’ll be cooking or storing gear
Once you’re happy with the orientation, loosely stake the four corners just enough to hold the tent in place while you work. You’ll adjust later — this just keeps the tent from blowing around while your hands are busy with poles.
Step 4: Assemble and Insert the Poles
This is where most first-timers get nervous, and where going slow makes all the difference.
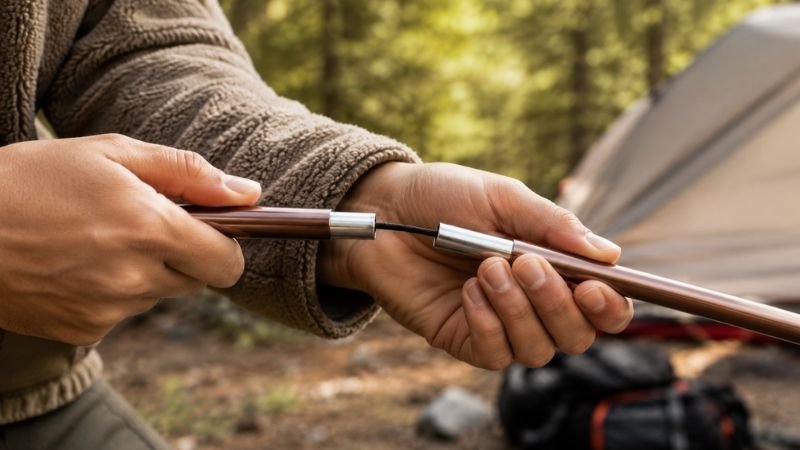
For shock-corded poles (the most common type — these are poles with elastic cord running through them that snap together):
- Don’t whip the pole around to snap sections into place — you can crack a section or hit someone nearby
- Instead, unfold one section at a time and push each joint together firmly
- If a section feels stiff, check that the cord hasn’t tangled and that you’re aligning the joints correctly
Inserting poles into the tent: Most beginner-friendly tents are either clip-style (small plastic clips on the tent body attach to the poles) or sleeve-style (you thread the pole through fabric channels). Check your tent type:
- Clip-style: Lay poles across the tent in an X-pattern (for a dome tent), then attach the clips from one corner to the other, working toward the center. The tent will start to take shape and rise off the ground as you go.
- Sleeve-style: Thread each pole through its fabric sleeve from one end to the other, then seat the pole tips into the corner grommets (the small metal rings at the corners of the tent floor).
Seating the pole tips: These go into the corner grommets or stake-out tabs at the base of the tent. Press them in firmly — they should feel secure, not wobbly.
Once both poles are in, the tent should be standing on its own. This is a satisfying moment every time.
Step 5: How to Stake a Tent Properly
Staking is where most beginners make their most consequential mistake — and where a little knowledge saves a lot of frustration in wind.
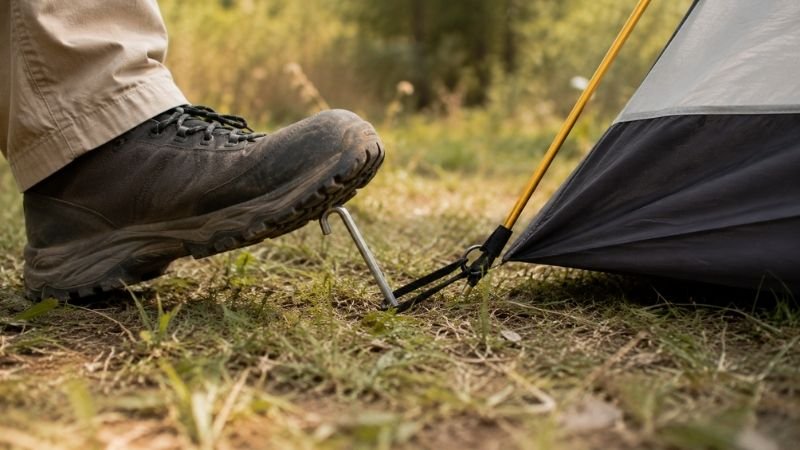
The angle rule: Stakes should go into the ground at approximately 45 degrees, angled away from the tent. Not straight down. A straight vertical stake can pull out when horizontal wind force pulls on the tent; an angled stake uses the soil itself as resistance.
How to drive stakes:
- Hold the stake at 45° pointing away from the tent corner
- Push it in by hand first to get it started
- Use your foot, a rock, or a stake hammer to drive it the rest of the way
- Leave just enough stake above ground to hook the tent’s corner loop or guyline over it
In rocky soil: If you hit rock immediately, move a few inches in a different direction. Don’t force a stake into rock — you’ll bend it.
In soft or sandy soil: Stakes pull out easily. Use wider stakes (sand stakes or deadman anchors if you have them) and bury them more deeply.
How many stakes to use: At minimum, stake all four corners. On calm nights in established campgrounds, four stakes is usually fine. In any wind, stake the guyline loops as well (more on this below).
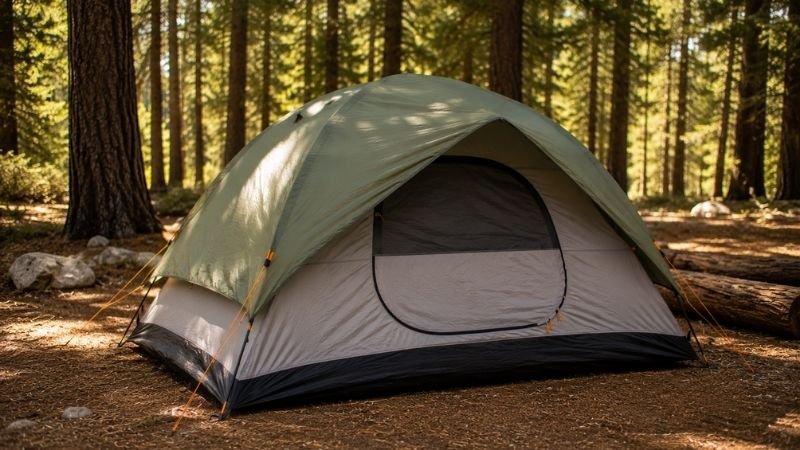
Step 6: Attach the Rainfly
The rainfly is the waterproof outer cover that goes over your tent. Without it, your tent’s mesh interior will let rain straight through.
How to attach it:
- Drape the rainfly over the tent — there’s usually a “this end up” indicator or a door alignment marker
- Match the rainfly doors/vents to your tent doors
- Clip or buckle the fly to the tent at each corner (look for buckles, velcro, or clips depending on your tent model)
- Tighten the corner straps to pull the fly taut
The most important detail about rainfly setup: The rainfly must not be touching the tent body. If the fly contacts the inner tent, it creates a moisture bridge — water transfers through contact even if the fly itself is waterproof. Pull the fly tight enough that there’s a visible gap between the fly and the tent body, especially at the top.
If your tent has velcro wraps on the underside of the fly: These attach around the nearby tent pole and help stabilize the fly. Secure each one.
Step 7: Set Up Guylines for Wind Stability
Guylines (also called guy ropes) are the cords that attach to loops on your rainfly and stake out to the ground, bracing the tent against wind.
For a calm-weather campground camping, many beginners skip guylines. This is fine for mild conditions. But if there’s any wind — or if there’s a chance of wind overnight — setting at least a few guylines dramatically improves tent stability.
Basic guyline setup:
- Find the guyline attachment loops on your rainfly (usually at the midpoint of each side, above the tent poles)
- Attach the guyline cord to the loop (a simple overhand knot works; your tent may include pre-attached cords)
- Stake out at 45° away from the tent, keeping the line taut but not so tight it distorts the tent shape
- Adjust the tensioner (the small plastic piece on the cord) to get the right tension
In strong wind: Use all available guyline attachment points. A well-staked, well-guyed tent handles significantly more weather than an unstaked one.
The 5 Most Common Tent Setup Mistakes (And How to Avoid Them)
These come from every camping forum, every “what I wish I’d known” post, and every first camping trip story. Learn them before you go.
Mistake 1: Skipping the home practice run. Setting up a tent for the first time in the dark, at an unfamiliar campsite, is significantly harder than doing it once at home in daylight. Practice at home. It takes 20 minutes and changes everything.
Mistake 2: Staking vertically. Stakes driven straight down pull out in wind because the force direction is almost parallel to the stake’s resistance axis. Angle them at 45° away from the tent. Every time.
Mistake 3: Letting the rainfly touch the tent body. Contact creates a moisture bridge. Even in a quality waterproof tent, water will transfer through contact points. Tension the fly until there’s a clear gap.
Mistake 4: Forcing stuck pole joints. If a pole section won’t seat properly, don’t force it — you can crack the section. Back up, check alignment, and try again slowly.
Mistake 5: Picking the campsite after unpacking. Once you’ve laid out all your gear, there’s psychological pressure to set up right there regardless of whether the spot is actually good. Choose your spot first, then unpack.
Setting Up a Tent in Rain or Wind: What Changes
Camping in bad weather isn’t ideal for first-timers, but sometimes the forecast surprises you. Here’s what to adjust:
In rain:
- Set up the rainfly before or simultaneously with the tent body, not after
- Work quickly on the staking before gear gets wet
- Keep the tent bag and any gear you can’t afford to get wet under cover (in your car or under a tarp)
- Stake the guylines immediately — don’t wait to see if the wind picks up
In wind:
- Orient the strongest pole structure into the prevailing wind (usually the narrower end of the tent)
- Stake all corners before raising poles — this keeps the tent from becoming a sail
- Set all guylines, not just the corners
- If wind is severe, consider a more sheltered location before committing to setup
How to Take Down a Tent and Pack It Properly
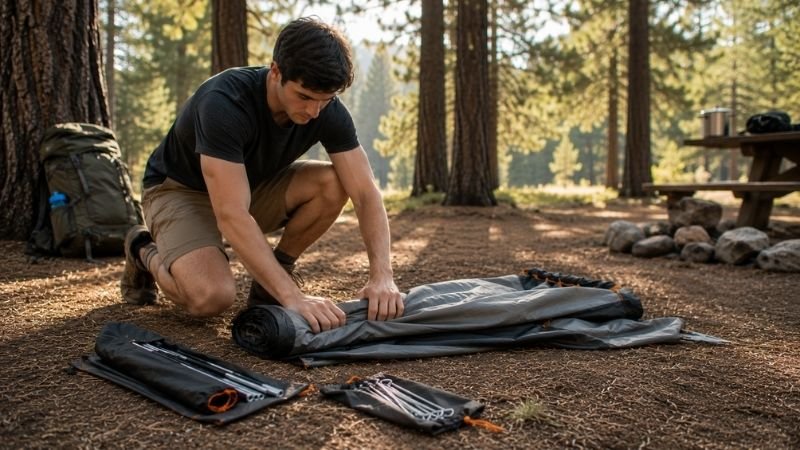
Almost every tent setup guide ends when the tent is up. But first-time campers also need to know how to get the tent back in the bag — which, the first time, can be its own challenge.
Step-by-step tent takedown:
1. Remove all gear from inside the tent first. Empty the tent completely before starting to disassemble. Gear left inside makes packing harder and can damage the tent.
2. Remove the rainfly. Unclip or unbuckle it from the tent, remove any guylines, and lay it flat to air out briefly if it’s wet. A wet rainfly packed immediately will develop mildew.
3. Remove tent stakes. Pull each stake straight out. If it’s stuck, use another stake or a multi-tool to lever it out — don’t twist the tent fabric.
4. Disassemble the poles. Collapse each pole section starting from the middle, not the ends — this distributes wear on the shock cord evenly. Fold gently; don’t let sections snap shut.
5. Fold the tent body. There’s no single correct way to fold a tent. A general approach: fold it in thirds lengthwise to roughly match the width of the stuff sack, then roll it from one end. Each time you pack it, fold it differently — this prevents permanent crease lines that can weaken waterproof coatings over time.
6. Pack in order: Stakes in their bag → poles in their bag → rainfly → tent body. Check that everything fits before you assume you’re done.
The wet tent rule: If your tent is wet when you pack it, unpack and dry it completely as soon as you get home. A tent stored wet will develop mildew that damages the fabric and waterproof coating and is difficult to remove.
If You Only Have 10 Minutes to Set Up
Sometimes you arrive at the campsite later than planned, or rain is coming and you need to move fast. Here’s the minimum viable setup in the right order:
- Pick your spot (30 seconds — just make sure it’s level and not in a dip)
- Lay out footprint (1 minute)
- Assemble poles and clip/sleeve into tent body (5 minutes)
- Stake four corners (1 minute)
- Attach rainfly and tighten (2 minutes)
That’s a functional tent in 10 minutes. Guylines can wait until things settle down.
FAQ: Real Questions About Setting Up a Tent
Q: How long does it take to set up a tent? For most beginner-friendly dome tents, 15–25 minutes on a first attempt. After 2–3 times, most people get it under 10 minutes. Two people working together is faster than one — one person manages poles while the other handles stakes.
Q: Can I set up a tent by myself? Yes, for most standard dome tents. The main challenge is keeping the tent body from blowing around while you work the poles alone. Tip: stake the corners loosely first to hold the tent in position, then work the poles with both hands.
Q: Do I need a tent footprint? It’s strongly recommended, though not absolutely required. A footprint protects the tent floor from abrasion and punctures, and helps prevent moisture from wicking up from the ground. A basic tarp cut slightly smaller than your tent floor works as a budget alternative.
Q: What if I can’t push a stake into the ground? First, try a different spot — you may have hit a rock. If the ground is genuinely hard, use a rock or stake hammer to drive it in. Never force a stake so hard that it bends — a bent stake is difficult to remove and provides poor holding power.
Q: How do I know if my tent is waterproof? A properly set up tent with a well-tensioned rainfly should keep you dry in moderate rain. Key checks: rainfly not touching tent body, all seams sealed (new tents may need seam sealer applied to external seams — check manufacturer instructions), tent pitched taut so water runs off rather than pooling.
Now You’re Ready
Setting up a tent is one of those things that feels intimidating right up until the moment you’ve done it once. After that first setup — especially if you practice at home first — it becomes a straightforward, satisfying part of the camping experience.
You don’t need to be particularly handy, particularly experienced, or particularly outdoorsy to get a tent up and secure. You just need clear steps and a little patience the first time.
The campsite is waiting. Go set it up.
Continue building your camping skills:
- The Complete Camping Packing List for Beginners
- Camping for Beginners: The Complete First-Timer’s Guide
- Sleeping Bag Temperature Ratings Explained for Beginners
- Outdoor Safety for Beginners
References
- REI Co-op. How to Set Up a Tent — Expert Advice. rei.com/learn/expert-advice/tent-set-up.html
- Leave No Trace Center for Outdoor Ethics. Campsite Selection and Durable Surfaces. lnt.org
- Recreation.gov. Ten Tips for First-Time Tent Campers. recreation.gov
- National Park Service. Camping and Wilderness Safety. nps.gov