
You’ve found a trail that looks perfect, packed your backpack, and you’re almost ready to head out. Then one question pops into your mind:
How long is this hike actually going to take?
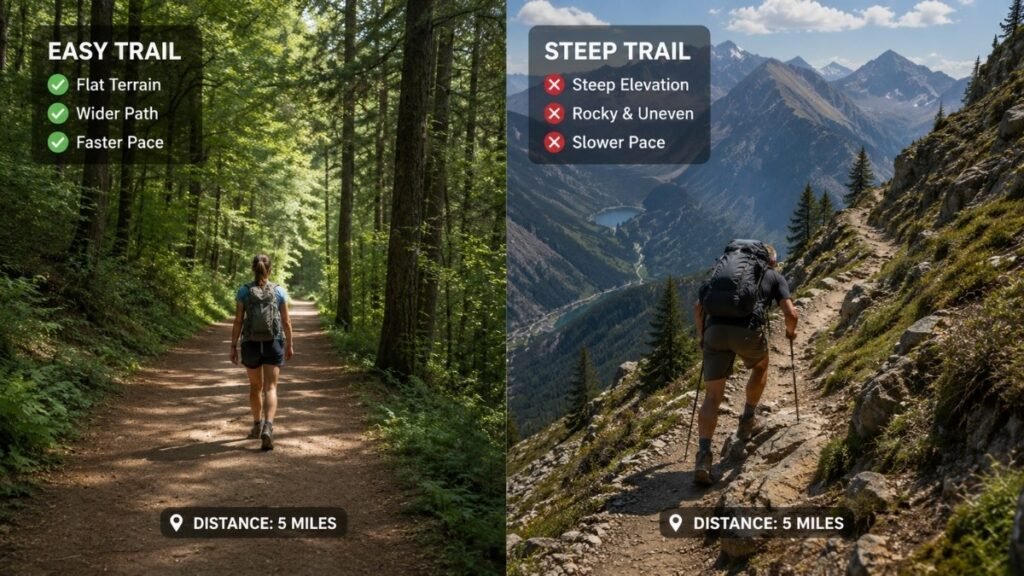
It’s a fair question—and one that’s surprisingly easy to get wrong. A 5-mile hike on a smooth, flat trail can feel like a relaxing afternoon walk. The same distance with a long, steep climb? That’s a completely different day.
That’s where a hiking time calculator comes in. It helps you estimate how long you’ll really be on the trail by looking at more than just mileage. In this guide, we’ll show you how it works, what affects your hiking time, and a few simple tips to help you avoid running out of daylight or packing too little water.
Overview: The Quick Answer
A hiking time calculator estimates your total hiking time using four main factors: distance, elevation gain, your fitness level, and the terrain you’ll be walking on. Most calculators are built on a hiking formula called Naismith’s Rule, adjusted to be more realistic for beginners and casual hikers (the original formula was designed for fast, experienced trekkers, not weekend explorers).
Here’s what to keep in mind:
- The number you get is a planning estimate, not a guaranteed finish time.
- Always add a buffer of 30 to 120 minutes on top of your estimate for breaks, photos, and the unexpected.
- The longer or steeper the hike, the bigger the buffer you should build in.
Quick Tip: Never plan to finish a hike exactly at sunset. Aim to be back at the trailhead 1–2 hours before the sun goes down. Trails get confusing fast once the light starts fading.
Hiking Time Calculator
(Your interactive calculator goes here — plug in your numbers below and get an instant estimate.)
Using it takes less than a minute. Just fill in a few details about your hike and your hiking style, and the calculator does the math for you.
What You’ll Enter
- Distance (in miles or kilometers)
- Elevation Gain (total climbing, not just the high point)
- Fitness Level — Beginner, Casual Active, or Regular Hiker
- Trail Difficulty — Easy Trail, Moderate Trail, or Rocky Trail
- Backpack Weight — Light, Medium, or Heavy
- Planned Break Time (optional — if you already know you want a lunch stop)
What You’ll Get Back
- Estimated Moving Time — how long you’ll actually be walking
- Estimated Total Time — moving time plus breaks
- Suggested Start Time — based on sunset and your total time
- Recommended Water Amount
- Recommended Snacks
- A Daylight Safety Reminder
If your estimated total time comes out to more than 4 hours, you’ll see a heads-up like this:
This is considered a longer hike. Bring extra water, food, and a headlamp — just in case.
That’s not the calculator being dramatic. It’s a genuinely common point where beginners underprepare, so it’s worth taking seriously.
How Does a Hiking Time Calculator Work?
Good news: you don’t need to do any of this math yourself. A hiking time calculator does it in the background, but understanding the moving parts helps you trust the number — and adjust it when your situation is a little different.
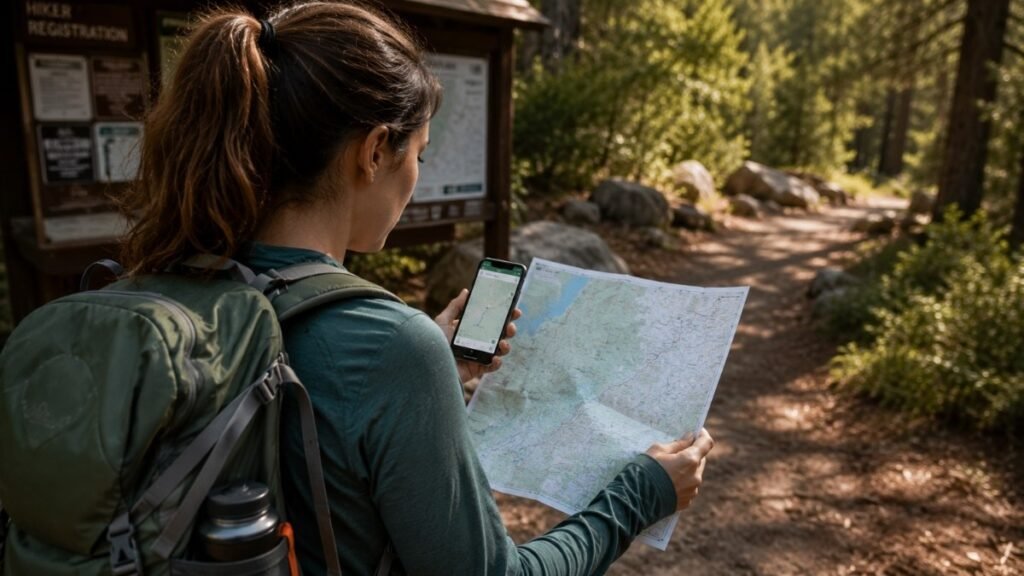
Distance
This one’s intuitive — the farther you’re walking, the longer it takes. But distance is only step one. Two 6-mile trails can take wildly different amounts of time depending on what else is going on underfoot.
Elevation Gain
Climbing is far slower than walking flat ground. As a rough starting point, hiking calculators typically add extra time for every set amount of elevation gained (this is the core idea behind Naismith’s Rule, which we’ll cover next). The steeper the trail, the more this factor dominates your total time.
Fitness Level
Your fitness level changes your pace more than most beginners expect. Someone who hikes regularly might comfortably cover flat ground at a brisk pace, while someone newer to hiking — even if they’re generally active — will naturally move slower on trails. Neither is “wrong.” The calculator just needs to know which one you are so it doesn’t overestimate you.
Trail Conditions
Not all trail surfaces are equal. Here’s how a few common ones tend to slow hikers down:
- Smooth dirt trail — minimal slowdown
- Rocky trail — requires careful footing
- Tree roots — trip hazards, especially when tired
- Sand — surprisingly tiring, every step sinks a little
- Snow — significantly reduces speed and grip
- Bushwhacking (off-trail) — the slowest of all, since there’s no clear path
Rest Stops
This is the piece most beginners forget to account for. Even a “quick” photo stop, water break, and snack pause can easily add 20 to 60+ minutes to your day once you tally them all up.
How your total hiking time actually adds up:
Walking Time → Photo Stops → Snack Breaks → Water Breaks → Total Trip Time
Each of those stops feels small in the moment, but they stack up fast — which is exactly why a good calculator asks about breaks instead of ignoring them.
From my own experience, break time is one of the easiest things to underestimate. On one of my first day hikes, I planned almost three hours of walking but forgot to factor in photo stops and a lunch break. The trip ended up taking nearly four hours instead.
Beginner Walking Speed Guide
Here’s a mistake almost every new hiker makes: assuming their walking pace around the neighborhood or mall translates directly to the trail. It doesn’t. Trail walking involves uneven footing, elevation changes, and a loaded backpack — all things your daily walk doesn’t have.
Average Hiking Speed for Beginners
| Fitness Level | Flat Trail | Mountain Trail |
|---|---|---|
| Beginner | 2 – 2.5 mph | 0.75 – 1.25 mph |
| Occasionally Active | 2.5 – 3 mph | 1.25 – 1.75 mph |
| Regular Exercise | 3 – 3.5 mph | 1.75 – 2.25 mph |
| Experienced Hiker | 3.5 mph+ | 2.25 mph+ |
For a deeper breakdown of what pace is realistic for your fitness level, check out our guide on average hiking speed.
When I started hiking, I assumed my normal walking pace would be about the same on the trail. I quickly realized that rocky paths, uphill sections, and a backpack slowed me down much more than I expected.
Why You Walk Slower on Trails
A few things are working against your pace the moment you step onto a trail:
- Uneven ground — your body works harder to stay balanced with every step
- Uphill climbs — your legs and lungs are doing far more than on flat pavement
- Heat — hot weather slows almost everyone down, even experienced hikers
- Fatigue — pace naturally drops the longer you’re out there
- Backpack weight — extra pounds on your back mean extra effort on every step
Quick Tip: City walking speed ≠ hiking speed. If you usually walk 3.5 mph around your neighborhood, expect something noticeably slower — often 1–2 mph less — once elevation and terrain enter the picture.
What Is Naismith’s Rule?
Naismith’s Rule is the classic formula hikers have used for over a century to estimate hiking time, and it’s still the foundation most hiking time calculators are built on.
The Original Formula
In plain terms: allow about 1 hour for every 3 miles (5 km) of distance, then add extra time for climbing — roughly 1 additional minute for every 10 meters (about 33 feet) of elevation gained. Add those two numbers together, and you’ve got a rough estimate.
Why It’s Still Popular
It’s simple, it doesn’t require any special equipment, and it gives a reasonable ballpark for most hikers in most conditions. That’s exactly why it’s stood the test of time.
Its Limitations
Naismith’s Rule wasn’t designed with beginners — or breaks — in mind. It doesn’t account for:
- Rest breaks, lunch stops, or photo pauses
- Trail surface (rocky, sandy, or root-covered ground)
- Heavy backpacks or overnight gear
- Weather conditions like heat, wind, or rain
Why Our Calculator Adjusts It
Because the original formula assumes a fit, uninterrupted hiker moving at a steady pace, we build in beginner-friendly adjustments — slower base speeds, break-time padding, and terrain penalties — so the estimate actually reflects a first-time or casual hiker’s real day on the trail, not an elite trekker’s.
Where Do I Find Distance and Elevation Gain?
You can’t estimate hiking time without these two numbers first — and thankfully, you don’t need any special gear to find them. A free app on your phone is enough.
Using AllTrails
- Search for your trail by name or location.
- Open the trail page and look for the stats bar near the top — it lists distance and elevation gain side by side.
- Scroll down to see the elevation profile, which shows you where the climbing happens (all at once, or spread out).
Using Google Maps
Google Maps can give you a rough distance if you’re plotting your own walking route, but it’s not built for trail elevation data the way hiking apps are. Use it as a backup, not your main source, especially for anything off paved paths.
Using Gaia GPS
Gaia GPS works similarly to AllTrails, with detailed elevation profiles and offline map downloads — handy if you’re heading somewhere with no cell signal.
Reading Trail Signs
If you’re old-school (or just forgot to check before you left), trailhead signs usually list mileage and sometimes elevation gain. Look for a small map or info board right at the parking area or trail entrance.
Why Is My Hiking Time Different From the Calculator?
Short answer: calculators estimate averages, and your hike is never exactly average. A handful of real-world factors can push your actual time above or below the estimate.
Weather
Heat, wind, rain, and humidity all slow hikers down — sometimes significantly. A 90°F day will add real time to your hike compared to a cool, overcast one.
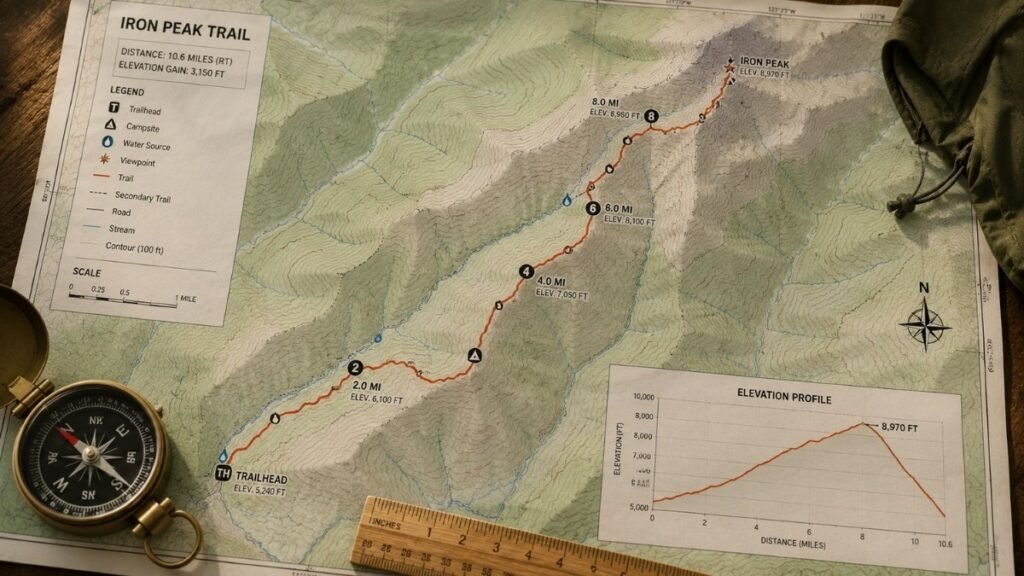
One hike that looked easy on the map ended up taking much longer because the trail was steeper than I expected. The distance hadn’t changed—but the constant climbing completely changed my pace.
Trail Surface
Loose gravel, muddy patches, and slick rocks all demand more caution and more time than a smooth, dry path.
Steepness
This is where a lot of beginners get surprised. 1,000 feet of elevation gain over 1 mile is an intense, leg-burning climb. 1,000 feet of elevation gain over 5 miles is a gentle, gradual incline. Same elevation number, completely different hikes — which is exactly why distance and elevation gain need to be looked at together, not separately.
Backpack Weight
Every extra pound on your back adds fatigue over time, which slows your pace — especially on climbs.
Fitness
Your day-to-day energy level matters too. A rough night’s sleep or an off day can shift your pace more than you’d expect.
Group Pace
Hiking with others? Your group moves at the speed of its slowest member, not its fastest.
Taking Photos
That “quick” photo stop at the overlook adds up more than it feels like in the moment.
Kids and Dogs
Both are wonderful hiking companions and both will slow your pace — kids need more breaks, and dogs love to investigate every smell along the way.
How Much Extra Time Should You Add?
Most beginners underestimate this part more than any other. Here’s the honest answer: add at least 30–60 minutes for a short hike, and 60–120 minutes for anything over 3 hours of moving time.
That buffer usually needs to cover:
- Breaks — even short ones add up across a full hike
- Lunch — a real sit-down meal easily takes 20–30 minutes
- Scenic stops — viewpoints are made for lingering
- Water refills — if you’re filtering water from a stream, budget extra time
- Navigation mistakes — wrong turns happen, even on well-marked trails
- Waiting for friends — someone always needs to tie their shoe or catch their breath
Warning: Most beginners underestimate break time. It’s tempting to think “we’ll just power through,” but stopping for water, snacks, and photos is part of a good hike — plan for it instead of fighting it.
I’ve learned that adding an extra hour to my hiking plan almost always makes the day more enjoyable. Instead of worrying about the clock, I have time to stop for photos, take breaks, and simply enjoy the trail.
Hiking Time vs. Hiking Difficulty
A longer hike isn’t automatically a harder one. Distance and difficulty measure two different things, and mixing them up is one of the most common beginner mistakes.
Long but Flat
A 10-mile hike on flat, well-maintained terrain can be very manageable — it just takes time, not intense effort.
Short but Steep
A 3-mile hike with a steep, relentless climb can leave you more exhausted than a much longer flat trail. Short doesn’t mean easy.
Which One Is Harder?
It depends on what “hard” means to you — endurance or intensity. Here’s a side-by-side comparison to make it concrete:
| Route Type | Distance | Elevation Gain | Estimated Time | Difficulty |
|---|---|---|---|---|
| Long & Flat | 10 miles | 300 ft | ~3.5 – 4 hours | Moderate (endurance) |
| Short & Steep | 3 miles | 1,800 ft | ~3 – 3.5 hours | Hard (intensity) |
| Balanced Route | 6 miles | 900 ft | ~3 – 3.5 hours | Moderate |
Notice how the short, steep route can take nearly as long as the long, flat one — and feel a lot tougher. This is exactly why relying on distance alone (without checking elevation gain) can set you up for a rough surprise. If you’re still building confidence on trails, our guide to hiking for beginners breaks down how to pick routes that match your comfort level.
Hiking Safety Based on Your Estimated Time
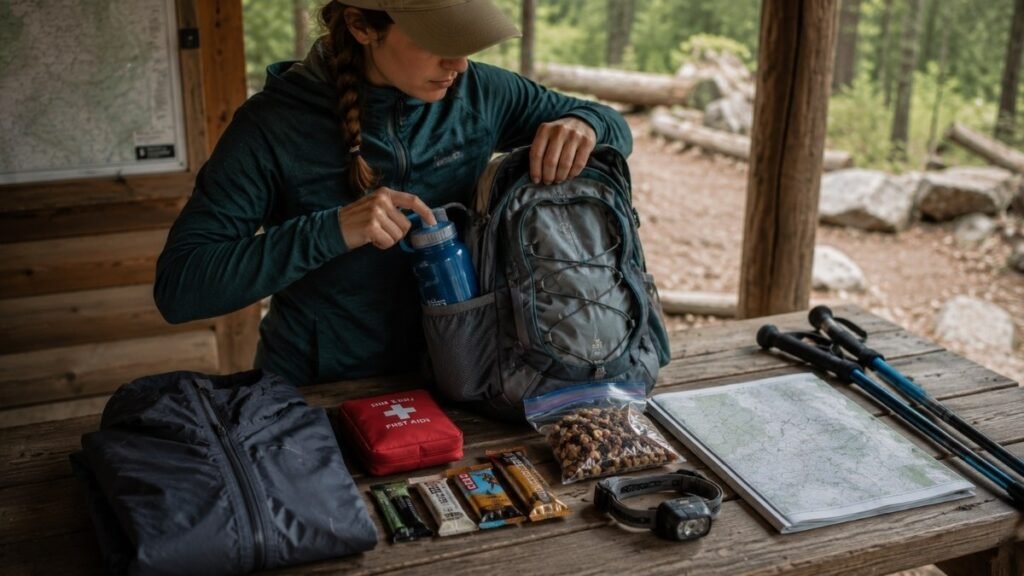
Here’s a simple rule of thumb: the longer your estimated hiking time, the more your gear list should grow. Use your calculator result to decide what to pack — not just the mileage.
Under 2 Hours
A short hike still needs the basics:
- Water bottle
- Hat
- Sunscreen
A simple, lightweight water bottle and a packable sun hat are usually all you need here — no need to overpack for a quick outing.
2–5 Hours
Once you’re out for a few hours, add:
- Daypack
- Snacks
- Trekking poles
- Rain jacket
This is the range where a proper 15–20L hiking backpack starts to earn its keep, and beginner-friendly hiking shoes make a real difference in comfort. For a full packing walkthrough, see our hiking packing list.
Over 5 Hours
Longer hikes call for backup plans:
- Headlamp
- Extra food
- Battery pack
- Emergency whistle
- Water filter
At this length, a headlamp, a hydration reservoir, and a portable water filter aren’t overkill — they’re the difference between a manageable delay and a genuinely stressful situation if something takes longer than planned. A compact power bank is worth the extra ounces too, especially if you’re navigating by phone.
Quick Decision Guide:
- Estimated time under 2 hours → basics only
- Estimated time 2–5 hours → daypack essentials
- Estimated time over 5 hours → full safety kit
None of these items need to be expensive or high-end — the goal is having the right category of gear, not the priciest version of it.
How Much Water and Food Should You Bring?
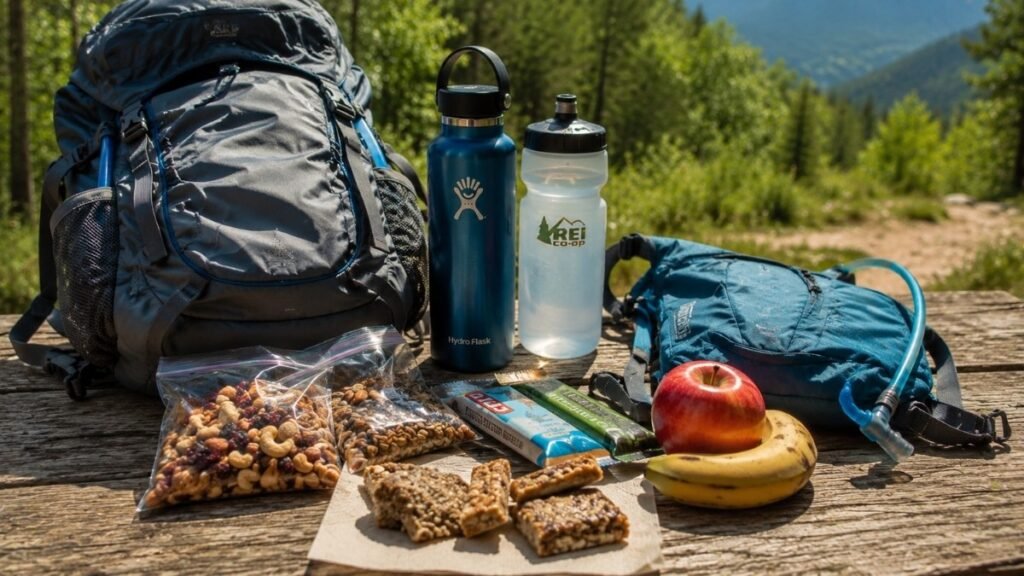
A good rule of thumb: half a liter of water per hour of moderate hiking, adjusted up for heat or elevation. Food should roughly track your hiking time too — the longer you’re out, the more calories you’ll burn.
Water Guide
| Hiking Time | Recommended Water |
|---|---|
| Under 1 hour | 0.5 L |
| 1 – 2 hours | 1 L |
| 2 – 4 hours | 1.5 – 2 L |
| 4 – 6 hours | 2 – 3 L |
| Over 6 hours | 3 L+ (or a filter/refill plan) |
Snacks Guide
| Hiking Time | Approximate Calories |
|---|---|
| Under 1 hour | 100 – 150 |
| 1 – 2 hours | 200 – 300 |
| 2 – 4 hours | 400 – 600 |
| 4 – 6 hours | 700 – 900 |
| Over 6 hours | 900+ (pack real meals, not just snacks) |
Trail mix, granola bars, and fruit are easy beginner-friendly options — for more ideas that hold up well outdoors, check out our list of hiking snacks.
Electrolytes
If you’re hiking over 2 hours, in the heat, or sweating heavily, plain water alone may not cut it. Electrolyte tablets or powders are a cheap, lightweight way to prevent the sluggish, headachy feeling that comes with depleted salt levels — worth tossing a packet into your bag even if you don’t use it every time.
Download a Printable Hiking Time Cheat Sheet
Cell service isn’t guaranteed on the trail, so it’s smart to have your numbers on paper, too. Our free printable cheat sheet includes:
- A distance-vs-time reference chart
- An elevation adjustment guide
- A water planning guide
- A snack and calorie guide
- A daylight safety reminder
Print it, fold it, and toss it in your pack — it’s designed to be useful even when your phone battery isn’t cooperating.
Beginner Hiking Planning Checklist
Before you head out, run through this list:
- [ ] Check the distance
- [ ] Check the elevation gain
- [ ] Calculate your estimated hiking time
- [ ] Check the weather forecast
- [ ] Check sunset time
- [ ] Download an offline map
- [ ] Pack enough water
- [ ] Pack snacks
- [ ] Tell someone your hiking plan
That last one matters more than it sounds — a quick text to a friend with your trail name and expected return time costs nothing and adds real safety. For more habits worth building early on, our outdoor safety for beginners guide is a good next read.
Frequently Asked Questions
How do I accurately estimate how long a hike will take based on both distance and elevation gain? Start with a base pace for distance (around 2–3 mph for most beginners on flat ground), then add extra time for elevation — roughly an additional minute for every 10 meters of climbing. A hiking time calculator does this automatically and adjusts for your fitness level and terrain, which is more reliable than doing the math by hand.
What is Naismith’s Rule, and how does it work for calculating hiking times? Naismith’s Rule estimates hiking time by allowing about 1 hour per 3 miles (5 km) of distance, plus extra time for elevation gain — roughly 1 minute for every 10 meters climbed. It’s a quick, formula-based starting point, though it doesn’t account for breaks or difficult terrain on its own.
Why does my hiking speed drop so drastically compared to my normal walking speed on flat ground? Uneven terrain, elevation changes, heat, fatigue, and a loaded backpack all combine to slow you down. Trail walking demands more balance and effort per step than walking on pavement, so a noticeably slower pace on the trail is completely normal.
How do I compare the difficulty and duration of a long, flat hike versus a short, steep hike? Compare both distance and elevation gain side by side rather than looking at mileage alone. A short, steep hike can take nearly as long — and feel more physically demanding — than a much longer, flatter route, because climbing slows your pace more than distance alone does.
Should I account for extra time in my calculation for rest breaks, snacks, and sightseeing? Yes, always. Breaks are one of the most commonly underestimated parts of hiking time. Add 30–60 minutes for shorter hikes and 60–120 minutes for longer ones to cover water stops, snacks, photos, and general rest.
How much does carrying a heavy backpacking pack slow down your average hiking pace per mile? A heavy pack can meaningfully slow your pace, especially on climbs, since extra weight increases fatigue with every step. There’s no single universal number, but it’s reasonable to expect your pace to drop as pack weight increases, particularly on steep terrain.
How do slippery roots, rocky terrain, or bushwhacking affect the accuracy of a hiking time calculator? These conditions all slow hikers down beyond what a basic distance-and-elevation formula accounts for. Most beginner-adjusted calculators build in a terrain penalty for rocky or difficult trails, but very technical terrain (like heavy bushwhacking) can still take longer than any calculator predicts.
When hiking in a group with varying fitness levels, how should the group’s total completion time be calculated? Base your estimate on the pace of the slowest hiker in the group, not an average. Groups naturally move at the speed of their least experienced or least fit member, so planning around that person keeps everyone safe and on schedule.
Final Thoughts
A hiking time calculator is a planning tool, not a promise — think of it as a helpful starting point rather than a countdown clock. Real trails have real variables: weather shifts, tired legs, and that one irresistible photo stop at the overlook.
The most important habit to build isn’t hitting your estimated time exactly — it’s giving yourself enough buffer to hike at a comfortable pace and still get back with daylight to spare. Enjoy the trail, take the breaks you need, and let the calculator do the worrying about the clock so you don’t have to.
🌿 Trail Notes: Why We Created This Guide
Every trail is different, and no calculator can predict every step you’ll take. What it can do is help you start with a realistic plan.
That’s why this guide goes beyond distance alone. We explain how elevation, terrain, weather, fitness, and break time all affect your day on the trail, so you can make better decisions before you leave the trailhead.
Whether you’re heading out for your very first hike or planning a relaxing weekend adventure, our goal is simple: to make hiking feel easier, safer, and more enjoyable for everyone.
Because great hikes don’t start on the trail—they start with a good plan.
Keep Exploring the Outdoors:
- average hiking speed – guide to see how fitness, terrain, and elevation affect how fast most hikers walk.
- hiking for beginners – guide will help you choose routes, build confidence, and avoid common first-hike mistakes.
- hiking packing list – covers the essentials for day hikes, from water and snacks to safety gear.
- hiking snacks – guide covers lightweight, easy-to-pack options that keep your energy up on the trail.
- outdoor safety for beginners – guide to learn simple habits that can make every hike safer and more enjoyable.
❤️ A Final Note
Finding reliable information shouldn’t be complicated.
At Trailnexo, every guide is created to help you make informed decisions with practical advice, honest recommendations, and beginner-friendly explanations. We focus on clear, useful content that saves you time, builds your confidence, and helps you avoid common mistakes.
Our goal is simple: helping you make smarter choices with confidence, one guide at a time.