
An honest guide to trekking poles — when they’re worth it, when they’re not, the science behind the knee-saving claims, and the best budget picks for first-time hikers.
Key Takeaways
- Hiking poles are genuinely worth it for descents, long hikes with elevation gain, and anyone with knee concerns — but not necessary for flat, easy trails under 5 miles
- Research published in Harvard Health confirms that going downhill places compressive forces on knees 3–4 times higher than level walking — poles can meaningfully reduce this
- For beginners, aluminum poles are the better choice over carbon fiber — they’re more durable when dropped or leaned on hard, and significantly cheaper
- The sweet spot for budget hiking poles is $40–70 — anything under $30 tends to have locking mechanisms that fail; anything over $120 is paying for weight savings most beginners don’t need
- Correct pole length matters more than brand — set at elbow height with your arm at 90°, adjusted slightly shorter for uphills and longer for downhills
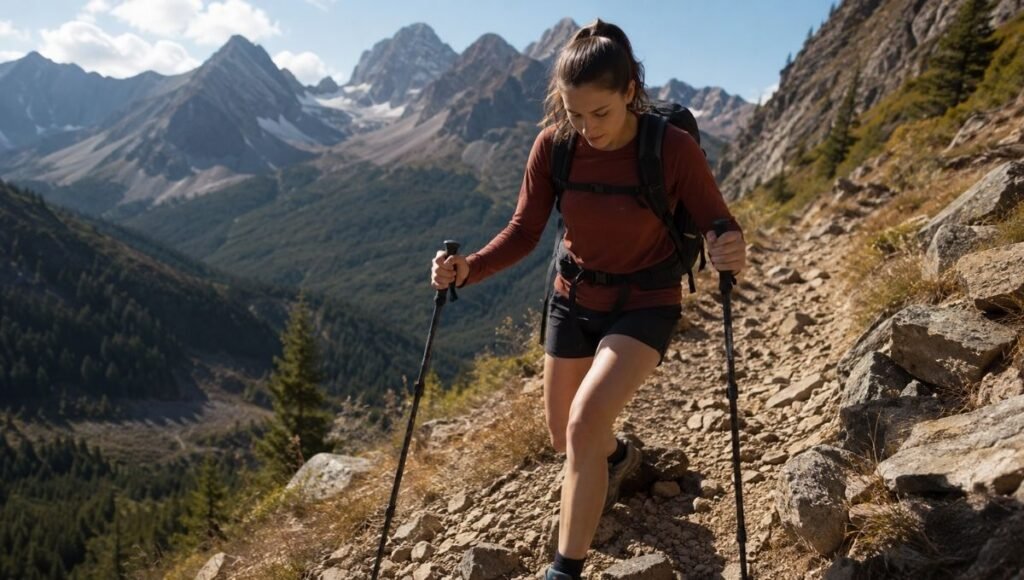
You’re on your second or third hike, something with actual elevation this time. The climb is fine — challenging but manageable. Then you start the descent. By mile 2 on the way down, your knees are sending you signals they were never designed to handle. You watch someone glide past you with trekking poles, moving efficiently and apparently painlessly, and the thought crosses your mind for the first time: maybe those aren’t just for old people.
Or maybe you’ve been wondering since before your first hike whether hiking poles are actually useful or just expensive sticks that make you look more serious than you are. It’s a completely reasonable question. And the honest answer is: it depends on what kind of hiking you’re doing — but for the situations where they help, they help a lot.
This guide gives you a clear answer on whether you need hiking poles, the actual science behind the knee protection claims (which is more nuanced than most articles admit), how to choose between the different types, and the best trekking poles for beginners at every price point.
Are Hiking Poles Worth It? The Honest, Situation-Specific Answer
Let’s start with the question everyone actually wants answered before they spend money.
Yes, hiking poles are worth it if:
- Your hike has significant elevation loss (descending 500+ feet on steep terrain)
- You’re carrying a heavy pack (15+ lbs) for several miles
- You have any history of knee, ankle, or hip issues
- You’re hiking on uneven, rocky, or slippery terrain
- Your hike is longer than 5–6 miles, especially in varied terrain
- You’re building hiking fitness and want additional stability during the learning phase
Poles are probably not necessary if:
- You’re doing flat or gently rolling trails under 5 miles
- You’re on well-maintained, even paths where balance isn’t a concern
- You’re doing technical scrambling that requires your hands (poles get in the way)
- You genuinely hate the feeling of hiking with anything in your hands
The most common conversion story in hiking communities goes like this: “I thought poles were unnecessary until my first real descent. Never hiking without them now.” The shift usually happens on the first hike with meaningful downhill — that’s when the practical value becomes undeniable.
Editor’s note: There’s a certain stubbornness among some hikers about not using poles — as if using them is somehow cheating or a sign of weakness. This is outdoors gear mythology. Poles are tools. If they make your hike safer and more comfortable, use them.
What the Science Actually Says About Hiking Poles and Knee Protection
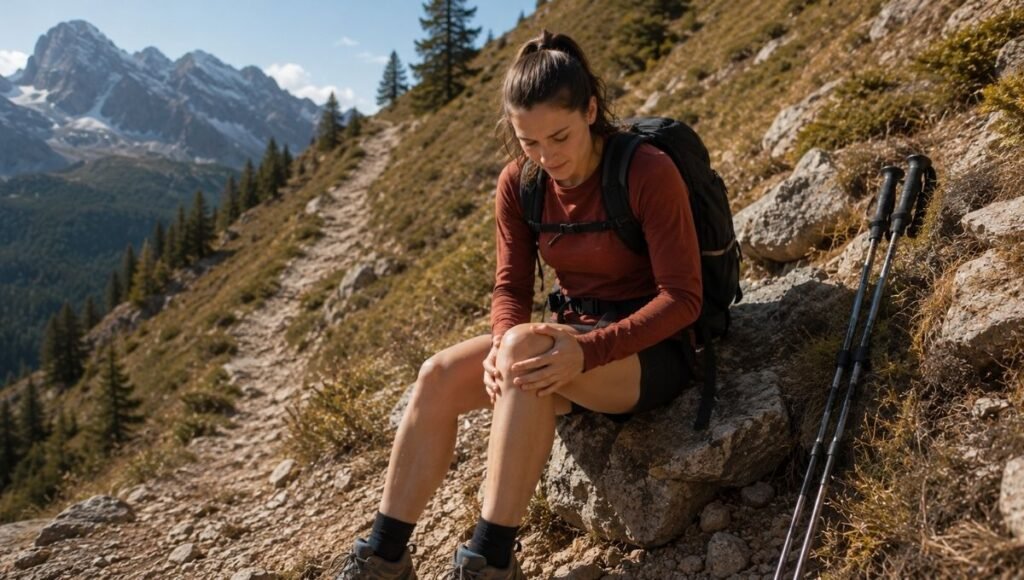
Most articles on this topic cite a 1999 study claiming trekking poles reduce compressive forces on knees by up to 25% on descents. The reality is more nuanced — and actually more interesting.
Research published through Harvard Health confirms the underlying biomechanics: descending is substantially harder on your knees than ascending. Going downhill places compressive forces on knee joints that are three to four times higher than forces experienced when walking on level ground. This isn’t anecdote — it’s consistent across multiple biomechanical studies done in controlled lab conditions.
What poles do is transfer some of that loading from your legs to your arms and upper body. Your arms act as additional contact points with the ground, distributing the work more broadly. The 25% reduction figure is real in controlled conditions, though individual results vary based on how you use the poles (technique matters significantly — more on this below) and your terrain.
A 2007 study published in the Journal of Strength and Conditioning Research found that poles reduced net joint forces at the knee specifically during loaded downhill hiking, with effects more pronounced when carrying heavier packs. For beginners who are building hiking fitness and may not yet have strong lower-body stabilizing muscles, this load distribution can meaningfully reduce both discomfort during the hike and soreness in the days following.
The honest caveat: poles won’t fix poor hiking mechanics, and they’re not a substitute for building leg strength over time. But for most beginners navigating their first serious descents, they provide real and immediate benefit.
Carbon Fiber vs Aluminum Hiking Poles: Which Should Beginners Buy?
This is the most common materials question, and for beginners, the answer is clear: start with aluminum.
Here’s why, despite carbon fiber being the “premium” option:
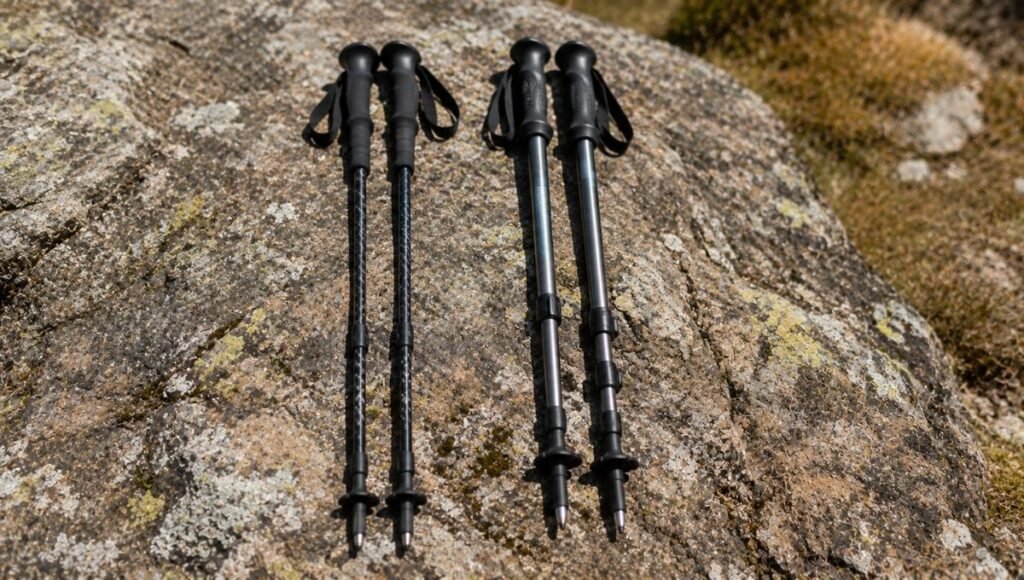
Aluminum Hiking Poles
Weight: 1.2–1.8 lbs per pair (heavier than carbon, but not significantly so for most day hikers) Durability: Bends under extreme stress rather than snapping. If you drop them, lean on them hard, or catch them in rocks, they survive. Price: $30–80 for a solid pair Best for: Beginners, anyone who hikes on rocky technical terrain, anyone who isn’t obsessive about weight
The key point about aluminum: It fails gracefully. When an aluminum pole reaches its stress limit, it bends — giving you a warning and often remaining usable. Carbon fiber, when it fails, snaps cleanly. A broken aluminum pole is inconvenient; a snapped carbon pole mid-hike is potentially a safety problem.
Carbon Fiber Hiking Poles
Weight: 0.8–1.2 lbs per pair (noticeably lighter, matters most on long days) Durability: Stiff and strong under normal use, but brittle under impact stress. Cracks and snaps when struck against rocks or dropped on hard surfaces. Price: $80–200+ Best for: Experienced hikers who prioritize weight, doing very long distances, and know how to handle poles carefully
The verdict for beginners: The weight difference between aluminum and carbon — typically 0.5–0.7 lbs per pair — is negligible for most day hikes. The durability difference is significant. Buy aluminum for your first poles, upgrade to carbon if and when you’ve established that you hike regularly and care about every ounce.
Folding vs Telescoping Hiking Poles: What’s the Difference?
Telescoping (adjustable) poles: Sections slide into each other and lock at your desired length. Most versatile option — easy to adjust on the trail for different terrain (shorter uphill, longer downhill). The standard design for most hiking poles.
Folding poles: Multiple short sections connected by an internal cord, like tent poles. Collapse into a compact bundle that attaches to your pack. Less adjustable but significantly smaller when packed.
For beginners: telescoping is the better starting point. The ability to adjust length on the fly is genuinely useful, and telescoping poles are typically more affordable at comparable quality levels. Folding poles are most valuable for trail runners and ultralight backpackers where pack space is at a premium.
One important feature to look for in any pole: the locking mechanism.
- Lever locks (FlickLock style): A flip-clasp that locks the pole at your chosen length. Easy to use, reliable, adjustable with gloves on. The best mechanism for beginners.
- Twist locks: Rotate to tighten. Common in cheaper poles, tends to loosen over time with use, harder to operate with cold or wet hands.
- Avoid twist locks for your first pair — the locking failure mode (pole suddenly collapsing on a steep uphill) is both annoying and occasionally dangerous.
Best Hiking Poles for Beginners: Picks by Budget
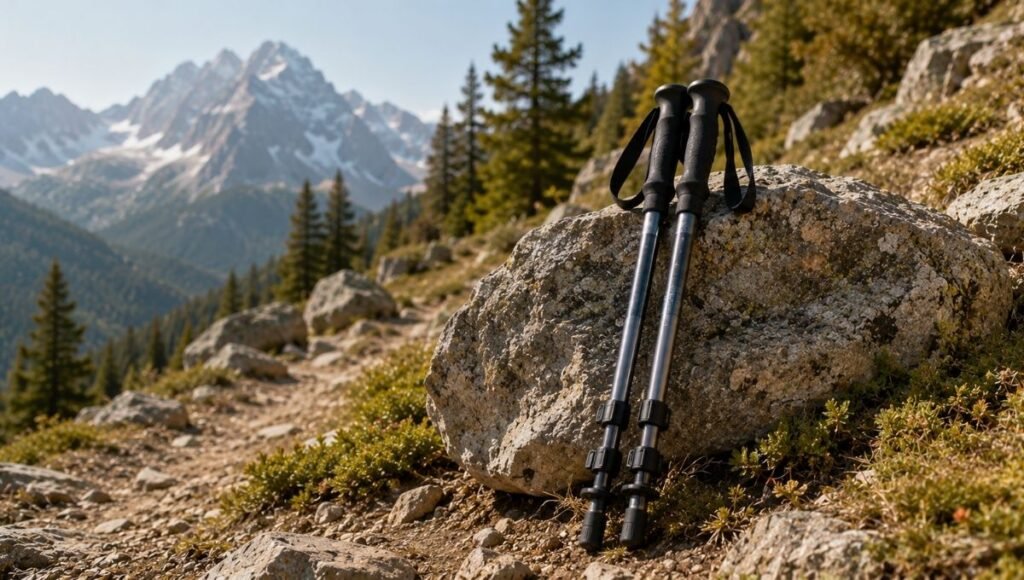
Best Under $40: Budget Entry Point
At this price, you’re getting functional poles that work for beginner use — but construction quality and locking mechanism reliability vary significantly. Look specifically for lever-lock mechanisms (not twist-lock) and aluminum shafts from recognizable brands.
REI Co-op Traverse Trekking Poles (~$35–40) REI’s house brand entry-level pole is the most consistently recommended budget option for beginners: aluminum shaft, lever-lock mechanism, adjustable 105–135cm, includes both carbide tips and rubber tips for varied terrain. Nothing flashy, everything functional.
Best for: First-time buyers who want to try poles before committing to a more serious investment.
Best $40–70: The Beginner Sweet Spot
This is where quality jumps noticeably. At this price point, you get significantly better locking mechanisms, more comfortable grips, and durability that lasts years of regular use.
Black Diamond Trail Trekking Poles (~$55–70) The most consistently recommended beginner hiking poles across outdoor communities, for the same reason the Black Diamond Spot headlamp dominates its category: reliable, well-built, intuitive, and backed by a brand that’s been making outdoor equipment since 1957.
The Trail poles feature 7075 aluminum shafts, FlickLock adjustability (the gold-standard lever lock system), EVA foam grips with a comfortable grip extension, and interchangeable tips. They collapse to a packable length and weigh approximately 1.1 lbs per pair — light enough not to notice, durable enough to abuse.
The cork grip version (Black Diamond Trail Cork, ~$80) is worth the upgrade if you sweat heavily — cork grips stay comfortable with moisture in a way foam doesn’t.
Cascade Mountain Tech Carbon Fiber Trekking Poles (~$40–50) A notable exception to the “don’t start with carbon” advice: this budget-friendly carbon option has built a strong reputation for offering genuine carbon pole weight (lighter than comparable aluminum) at a price point normally associated with aluminum. The trade-off is less polished construction than Black Diamond or Leki. Worth considering if weight reduction matters to you even at the beginner stage.
Best for: Regular hikers who plan to use poles consistently, anyone who wants equipment that’ll last several years without replacement.
Best $80–130: For Committed Hikers
Leki Micro Vario Carbon (~$120–130) Leki is to trekking poles what Black Diamond is to headlamps — the brand that keeps appearing in “what do experienced hikers actually use” discussions. The Micro Vario Carbon is a folding pole (rather than telescoping), which makes it compact enough to fit inside a backpack or attach easily to the outside. Carbon construction, cork grip, Leki’s proprietary speed lock system.
The trade-off: less adjustability than telescoping poles (you set the length, can’t easily change mid-hike), and the price. For beginners who are confident they’ll use poles regularly and prioritize packability, this is the upgrade to consider.
Best for: Hikers who already know they love poles and want something they’ll use for years.
How to Set the Right Length for Hiking Poles
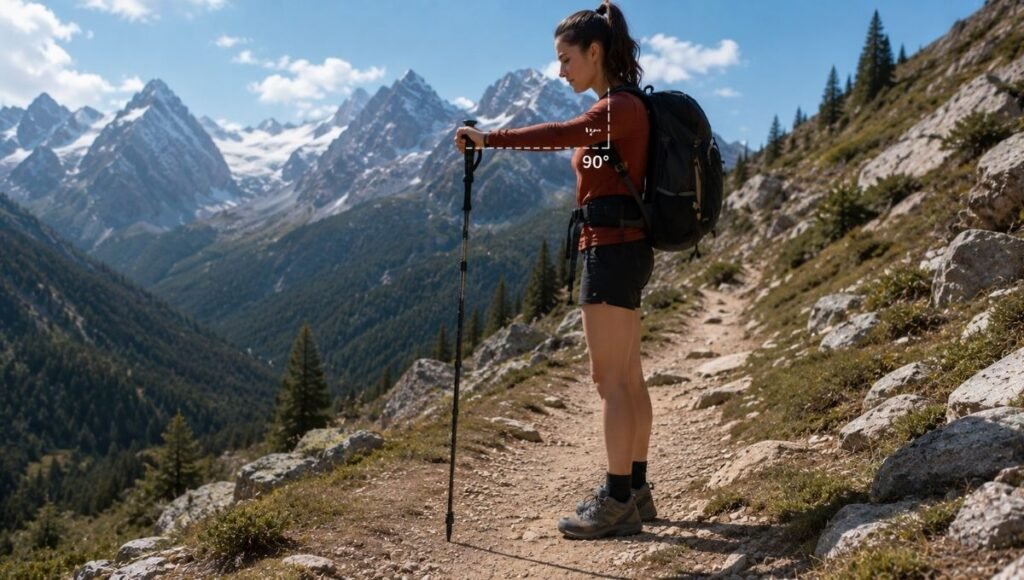
This is the detail most beginners skip, and wrong pole length significantly reduces their effectiveness.
The basic rule: Hold the pole grip with the tip on the ground. Your elbow should be at approximately 90°. This is your baseline length.
Adjustments for terrain:
- Uphill: Shorten poles by 5–10cm. This brings your center of gravity slightly forward and makes uphill pole planting more natural.
- Downhill: Lengthen poles by 5–10cm. This puts the pole tip further ahead and provides better braking support on descents — which is exactly when you need them most.
For telescoping poles: Make the adjustment at the trailhead or when the terrain consistently changes. You don’t need to stop constantly — just develop a habit of adjusting at the start of significant uphills and downhills.
How to Actually Use Hiking Poles (Most Beginners Get This Wrong)
Having the right poles with the wrong technique is like having good hiking shoes but walking on your heels. Here’s what experienced hikers mean when they say “use poles correctly.”
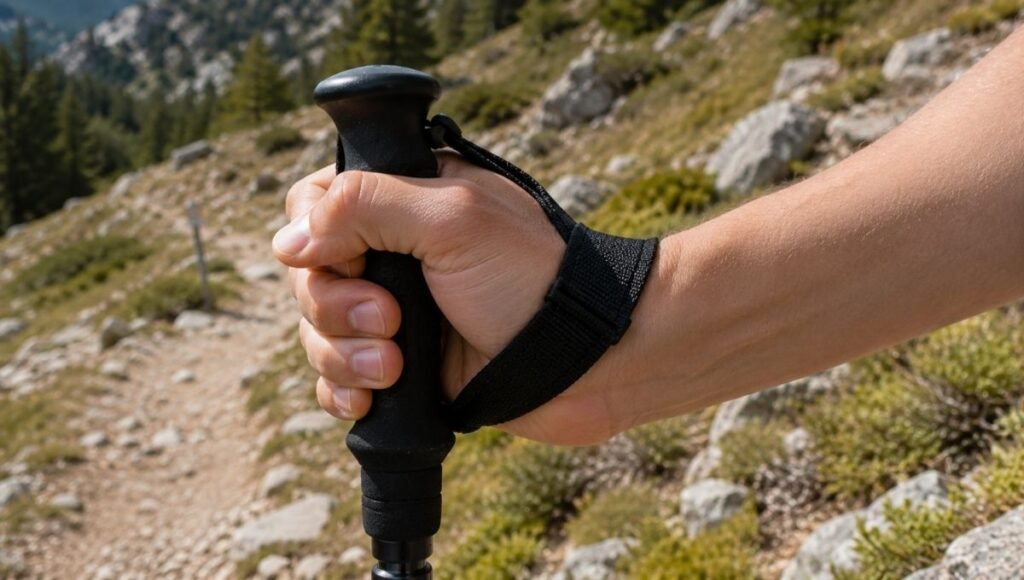
The Wrist Strap Technique
This is the most commonly misunderstood aspect of trekking poles. Most beginners grip the pole handle like a walking stick, ignoring the strap entirely or wearing it purely decoratively.
The correct technique:
- Put your hand up through the wrist strap from below, then grip the handle
- The strap should run across your palm, supporting the pole from your wrist rather than your grip
- When planting the pole, you push through the strap rather than gripping the handle tightly
Why it matters: When you use the strap correctly, you can open your hand between steps without losing the pole. This dramatically reduces hand and forearm fatigue on long hikes. Using poles without the strap technique means your grip is doing all the work — which fatigues your hands and reduces the arm-driving efficiency that makes poles useful.
The Alternating Rhythm
For most hiking, use an alternating rhythm — left pole plants with right foot step, right pole plants with left foot step. This mirrors natural walking mechanics and distributes effort evenly.
On steep uphills, some hikers switch to planting both poles simultaneously per step for maximum push. On technical terrain, poles provide balance support rather than a specific rhythm — plant them where needed rather than mechanically alternating.
When NOT to Use Your Poles
On technical scrambling where you need hands for balance or handholds, collapse and attach poles to your pack. Poles get in the way on narrow, heavily vegetated trails and can catch on branches. When crossing streams on stepping stones, free hands are safer than poles — the poles can catch between rocks and destabilize you unexpectedly.
The Hiking Pole Mistakes That Beginners Make
Mistake 1: Setting the wrong length and not adjusting. Wrong length poles provide almost none of the benefit of correct-length poles. Take the time to set them properly at the start, and adjust for significant terrain changes.
Mistake 2: Ignoring the wrist strap. As covered above — the strap is not decorative. Use it correctly or you’re leaving most of the ergonomic benefit untouched.
Mistake 3: Buying cheap twist-lock poles. The lock fails, the pole collapses unexpectedly on a steep section, and you learn an expensive lesson about why mechanism quality matters. Spend a little more and get lever-lock.
Mistake 4: Using poles on terrain where they’re a liability. Poles on technical scrambles, narrow brushy trails, and stream crossings can create hazards rather than prevent them. Know when to collapse them and clip them to your pack.
Mistake 5: Only using one pole. Some beginners borrow one pole from a friend or only buy one to save money. Two poles provide balanced load distribution; one pole creates asymmetric loading that can cause hip and back strain. Use two or none.
If You Only Have 5 Minutes to Decide
Do you hike mostly flat, easy trails under 5 miles? → Probably don’t need poles yet. Try a few more hikes first.
Do you have elevation gain/loss, hike 5+ miles, or have knee concerns? → Get poles. The Black Diamond Trail at $55–70 is the safe, reliable choice. Lever locks, aluminum, proven over years of real use.
Tightest possible budget? → REI Co-op Traverse at $35–40. Functional, lever-lock, won’t embarrass you.
Want the lightest option and don’t mind the trade-off? → Cascade Mountain Tech Carbon at $40–50. Not as durable as aluminum but genuinely lighter.
When to Talk to a Doctor Before Hiking with Poles
If you have diagnosed knee conditions (osteoarthritis, ACL issues, patellar tracking problems), consult your doctor or physical therapist before relying on poles as a primary joint management strategy. Poles reduce loading forces but are not a medical device — they don’t substitute for proper diagnosis and treatment.
If you develop new knee pain specifically during downhill hiking that persists after rest, this warrants medical evaluation rather than simply buying better poles. Sudden-onset joint pain that doesn’t resolve within a few days of rest is a sign to see a professional rather than power through.
FAQ: Real Questions About Hiking Poles
Q: Are trekking poles worth it for beginners? Yes, with conditions. For hikes with significant elevation change (especially descents), longer distances, or hikers with knee concerns — poles provide real benefits that most beginners notice immediately on their first use. For flat, easy trails, they’re optional. The most honest version: try a hike with elevation change once with poles and once without, and let the experience tell you whether they’re worth it for your hiking style.
Q: Do hiking poles actually help with knee pain? Research confirms that descending places compressive forces on knees 3–4 times higher than level walking, and poles reduce this loading by transferring some work to your arms. Individual results vary based on technique and terrain. For most hikers, the effect is noticeable on serious descents, less so on flat terrain. Poles are a useful tool for knee management, not a complete solution — building lower-body strength through regular hiking also helps significantly.
Q: What’s the difference between trekking poles and hiking poles? They’re the same thing. “Trekking poles” is the more European term; “hiking poles” or “hiking sticks” is common in North America. The products are identical — the naming difference is purely regional marketing terminology.
Q: Carbon fiber vs aluminum for beginners — which is better? Aluminum for beginners. It’s more durable under the kind of use beginners put poles through (occasional drops, rocky terrain, hard planting), significantly cheaper, and the weight difference (0.5–0.7 lbs per pair) is negligible for most day hikes. Upgrade to carbon once you’ve established that you hike regularly and weight matters to you.
Q: How do I know what length to set my hiking poles? Hold the pole grip with the tip on the ground beside you. Your elbow should form approximately a 90° angle. This is your baseline. Shorten 5–10cm for sustained uphill sections; lengthen 5–10cm for sustained downhill sections. Wrong length significantly reduces the benefit of using poles at all.
Take the Next Step
Whether you’re on the fence about hiking poles or ready to buy, the practical answer is always worth finding out for yourself. One hike with poles on terrain that has real elevation change will tell you more than any guide can.
The best hiking poles for beginners aren’t necessarily the most expensive or the lightest — they’re the ones you’ll actually bring, adjust properly, and use with correct technique. Start with aluminum, use the wrist straps, and set your length before you hit the trail.
Continue building your hiking kit:
- Hiking Boots for Beginners: How to Choose Without Wasting Money
- Best Lightweight Hiking Backpack for Beginners
- Average Hiking Speed: How Long Does a Hike Actually Take?
References
- Harvard Health Publications. Talking of Walking in Three Easy Pieces — Benefits of Hiking Poles. health.harvard.edu
- Bohne M, Abendroth-Smith J. (2007). Effects of hiking downhill using trekking poles while carrying external loads. Journal of Strength and Conditioning Research, 21(4), 1312–1316. PubMed PMID: 17218900.
- American Hiking Society. Trekking Pole Benefits and Trail Safety. americanhiking.org
- REI Co-op. How to Choose Trekking Poles — Expert Advice. rei.com/learn/expert-advice/trekking-poles.html
- Leave No Trace Center for Outdoor Ethics. Trekking Poles and Trail Impact. lnt.org